Chapter 6
Sunday, 17th September 1944.
"For the Dutch civilians on the ground it must have been like an armada of planes, gliders and parachutists in the air, something they had waited years to see and would lead to their liberation". Dvr. Jack Taylor. 17 September 1944.
No 1 Parachute Platoon proceeded to the aerodrome at Saltby, and further south, No 3 Platoon and its various detachments, left their Transit Camps at 08.00 hrs for the various mounting airfields, where they carried out last minute checks and adjustments to the loads. For the First Lift, the allocation was seven Horsa gliders and two parachute aircraft. It will make it easier to understand, to look at what happened to each in turn.
Horsa glider No 479 with Capt. William 'Bill' Gell and his 27 man platoon on board, took off from R.A.F. Keevil, piloted by men of 'D' Squadron, The Glider Pilot Regiment, with the Stirling tug aircraft being from 196 Squadron, R.A.F. It made it safely and accurately to Landing Zone 'Z'. One of those on board, was Dvr. Thomas Edward Jones, who had joined up in February 1942, was then posted to the Company in January 1943, and went with them to North Africa. He also went on to serve in Italy, where he qualified as a parachutist, so by September 1944, would have been considered one of the more experienced men. "I was in Capt. Gell's glider, with the rest of the Platoon, we landed okay, and I remember that we also had two Jeeps with two trailers with us". [1]
L/Cpl. 'Les' Ransom: "I landed about 12.00, noon, in a glider, and some of the other members of the Platoon with me were, 'Jimmy' Wild, 'Billy' Tripp, 'Len' Evans, Arthur Jackson, 'Geordie' Hall, 'Freddie' Hill, Cpl. Beardmore, Sgt. Staples and Captain Gell, the Platoon Commander."
Horsa glider No 480 with a Jeep, 2 x trailers and 3 men on board, took off from R.A.F. Keevil, piloted by men of 'D' Squadron, The Glider Pilot Regiment, with the Stirling tug aircraft being from 196 Squadron, R.A.F., and also made it safely and accurately to the same Landing Zone.
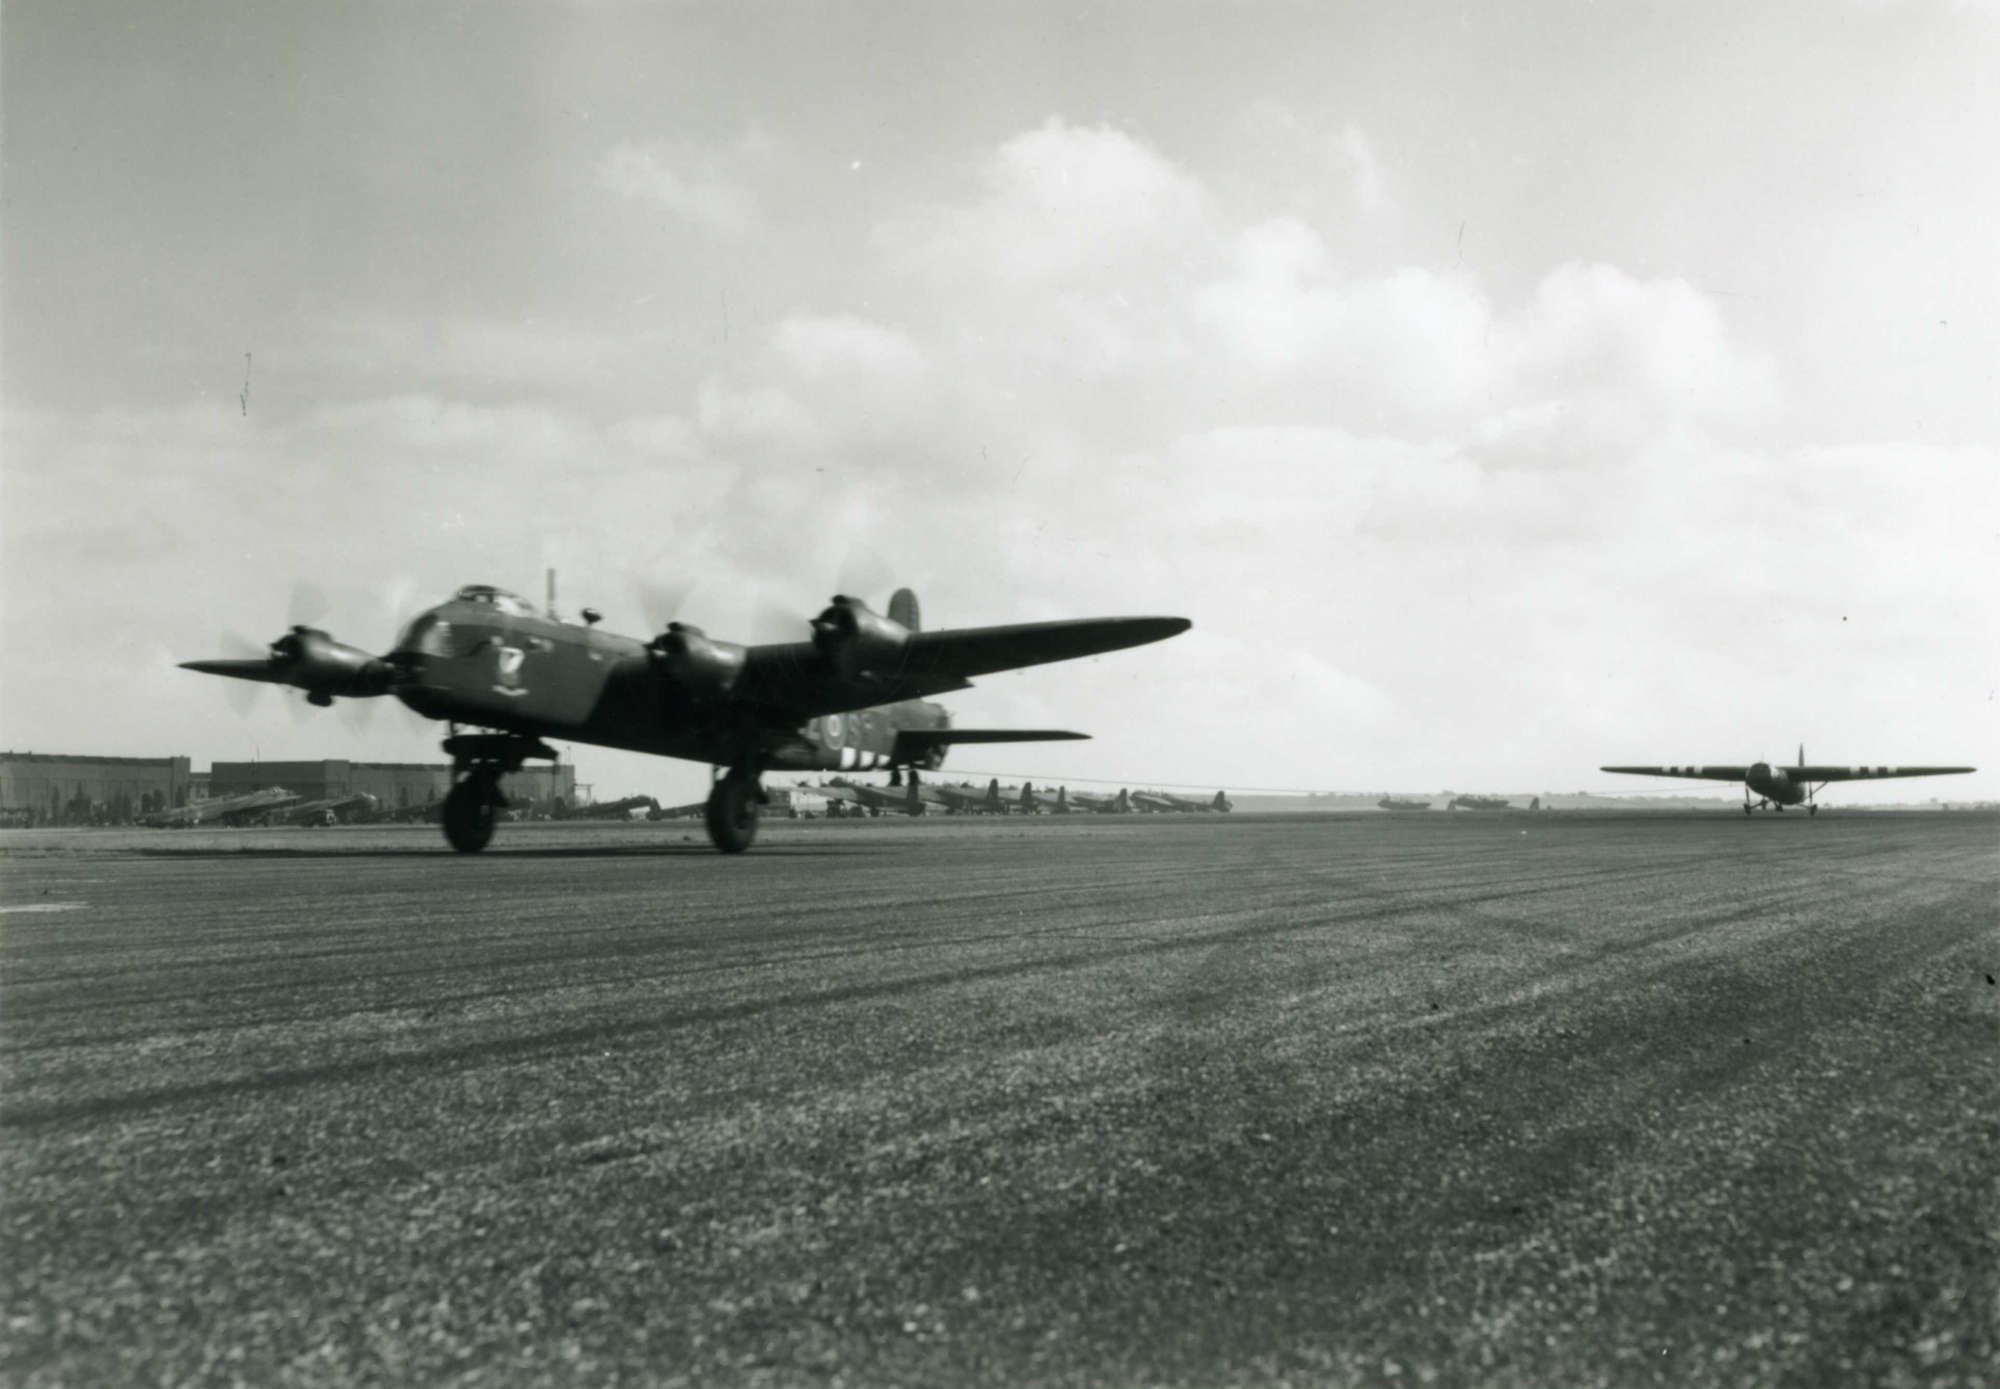
Part of a sequence of Stirling tug aircraft towing Horsa gliders from R.A.F. Harwell on Sunday, 17th September 1944. The next day aircraft of 298 and 644 Squadron's, R.A.F towed gliders flown by 17 Flight, 'A' Squadron, The Glider Pilot Regiment. On board C/N's 919 to 929 were Jeeps, trailers and troops from 250 Company, R.A.S.C. Courtesy I.W.M. CH13857.
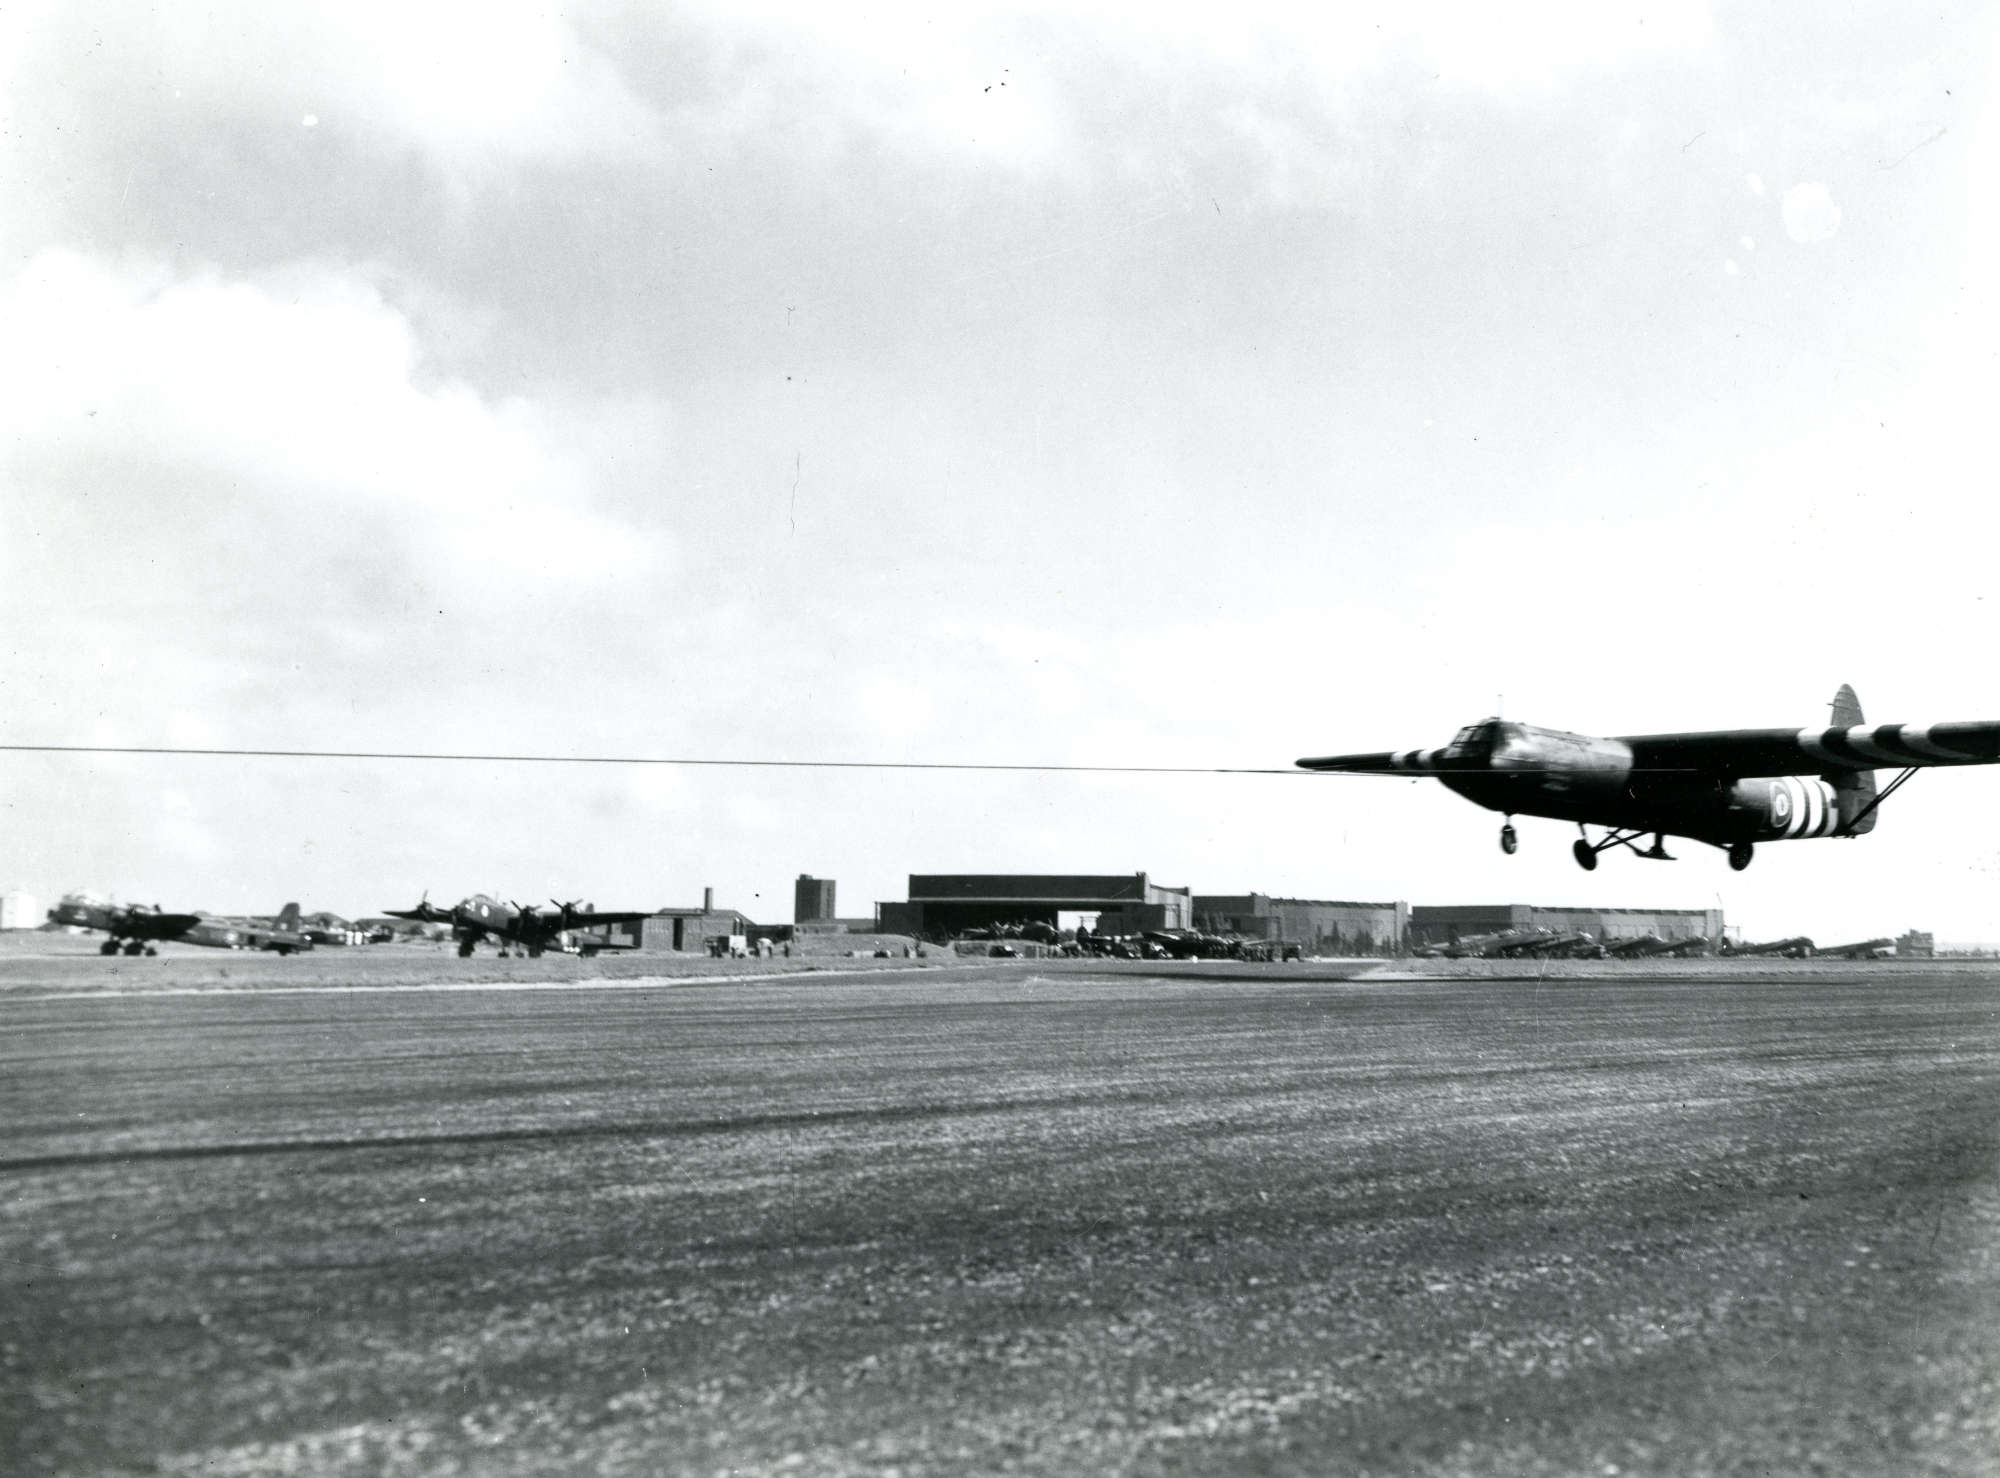
Another in the sequence of Stirling tug aircraft towing Horsa gliders from R.A.F. Harwell on Sunday, 17th September 1944. The next day aircraft of 570 Squadron, R.A.F towed gliders flown by 2 Flight, 'A' Squadron, The Glider Pilot Regiment. On board C/N's 970 to 974 were Jeeps, trailers and troops from 250 Company, R.A.S.C. Courtesy I.W.M. CH13858.
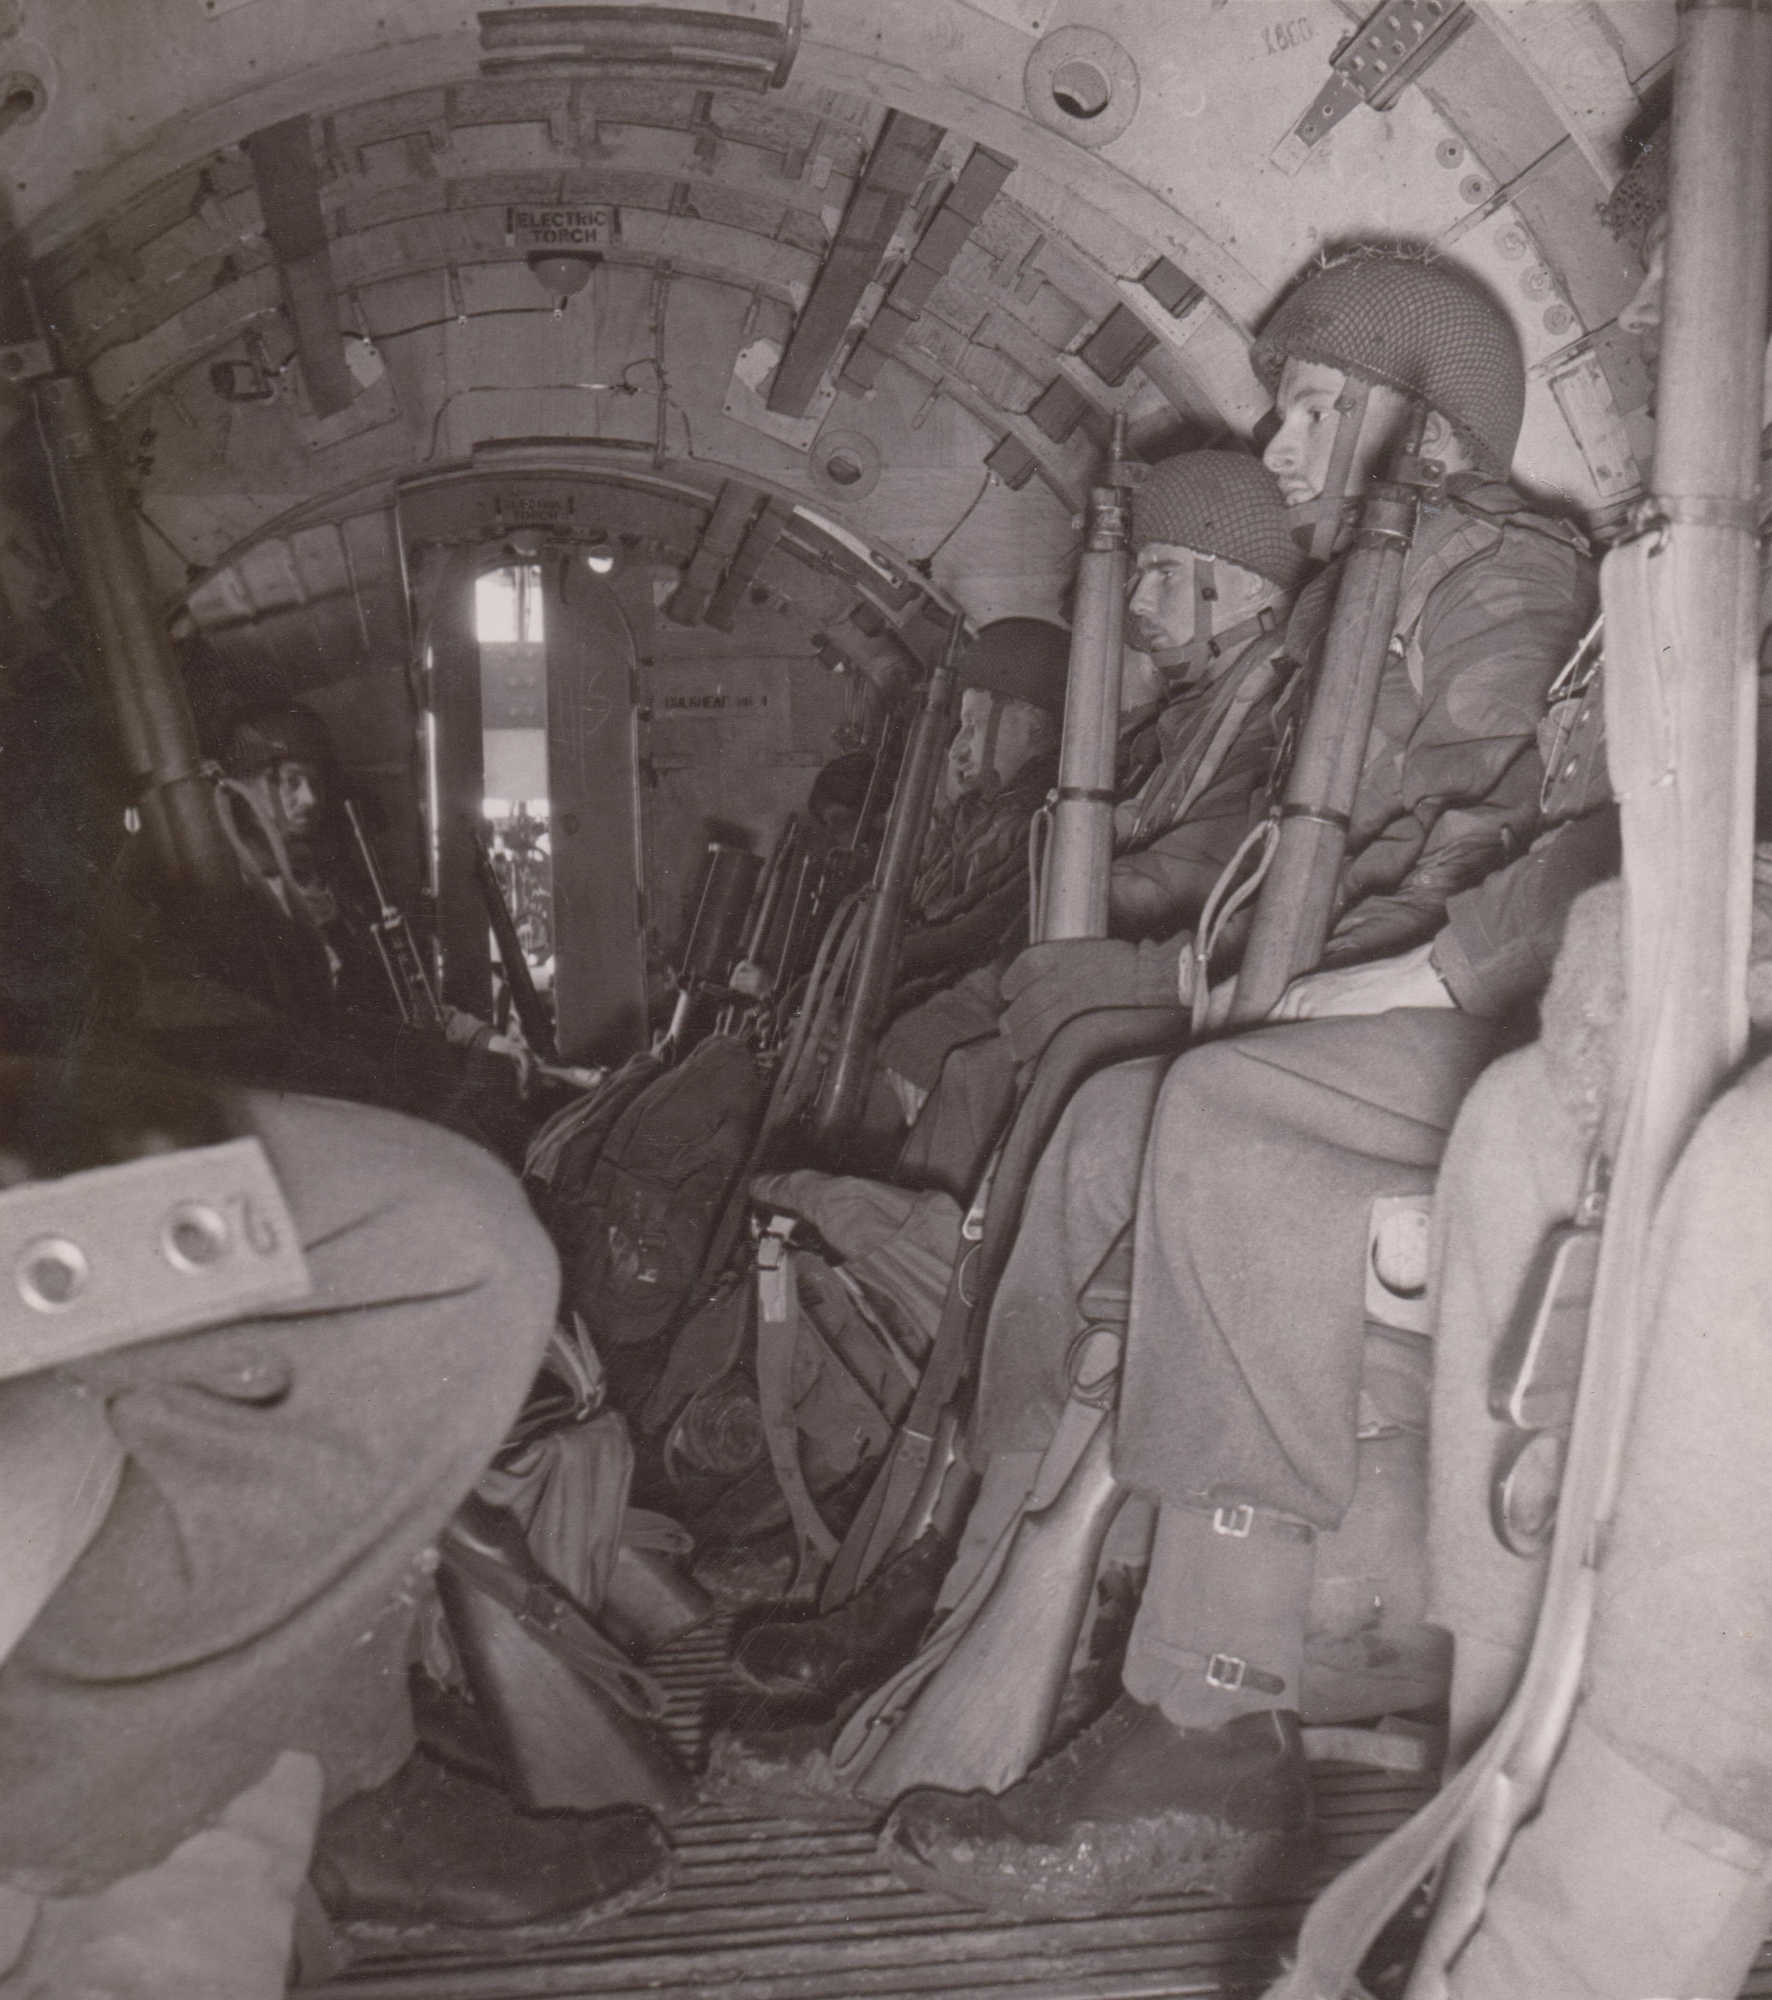
Inside a Horsa glider loaded with troops. A.F.D.C. 1943-44. Courtesy of Airborne Assault Museum, Duxford.
Horsa glider No 519 with a Jeep, 2 x trailers and 3 men on board, took off from R.A.F. Fairford at 11.00 hrs, piloted by men from 'G' Squadron, The Glider Pliot Regiment, and towed by a Stirling aircraft from 620 Squadron, R.A.F. however, failed. "The first glider to abort was Chalk Number 519. Regrettably, the Squadron Records of [620] Squadron are not very detailed: "Stirling LJ.873, Flying Officer Gawith. Time Up 1100, Time down 1120". In the 'List of Abortive Sorties' the only entry remarks: "Glider landed Down Ampney". Carrying a jeep plus trailer and three troops of No.3 Para Platoon of 250th (Airborne) Light Composite Company of the Royal Army Service Corps, the first pilot of this glider was G-Squadron's, S.S.M. White".
Horsa gliders No 379 and 380, each with a Jeep, 2 x trailers and 2 to 3 men on board, took off from R.A.F. Tarrant Rushton at 10.45 hrs, piloted by men from 'C' Squadron and towed by Halifax aircraft of 298 and 644 Squadron's, R.A.F. They made it safely and accurately to Landing Zone 'Z'. The First Pilot for C/N: 380, was S/Sgt. Ernest John Perfect: "I was then in 'C' Squadron, but I have no idea which Flight. I was First Pilot of a Horsa, flying from Tarrant Rushton on September 17th; the load was a Jeep and trailer and two men (REME I think, though I am not certain - they were certainly equipped for maintenance and repair of ordnance or vehicles). I jammed the release mechanism of the tail on landing, as I hit the port wing of another Horsa with the end of my starboard wing, but we hacked through the timber, got the tail off and the Jeep drove down onto the ground and gave us a lift to the edge of the field, where we joined other glider pilots". [2a]
Horsa glider No 264, with a load consisting of 6 - 7 men, a Jeep and two trailer's, took off from R.A.F. Broadwell at approx. 10.30 hrs, piloted by men of 'F' Squadron, The Glider Pilot Regiment, and towed by a Dakota aircraft of 512 Squadron, R.A.F. They landed on Landing Zone 'S', but overshot and hit some trees at the western end, resulting in the death of one man. On board were Maj. Clark, L/Cpl. Leslie Philip White, L/Cpl. William Henry Clay, Dvr. William Robert Thompson, Dvr. George Richard Stubbs and Dvr. Robert Claude Bondy. These men were all from either 3 (E) Parachute Platoon, or 'D' Transport Platoon, and had been assigned to Maj. Clark to carry out his tasks. It was Dvr. Bondy that was killed when the glider hit the trees, the Jeep broke free and crushed him. Later, the glider was discovered by a Dutchman, Cees Jongboer who worked at the Police Station in Oosterbeek, and he was visiting his fiancé Elly Evers, who was herself visiting friends at the Buunderkamp Hotel. On board they found some papers that belonged to Dvr. Stubbs, and assumed that he was the dead man. [2b]
The confusion was compounded when L/Cpl. Clay returned to the U.K. and wrote to Dvr. Bondy's widow, on the 6th October 1944, explaining that he: "had been with him and was the sole survivor". [2c] Dvr. Bondy was initially buried behind the Buunderkamp Hotel - he was just one day short of his 36th birthday.
This mass glider landing was too much for the Germans who were billeted in the Buunderkamp Hotel, and 36 of them willingly gave themselves up to the men of the 1st Airlanding Brigade.
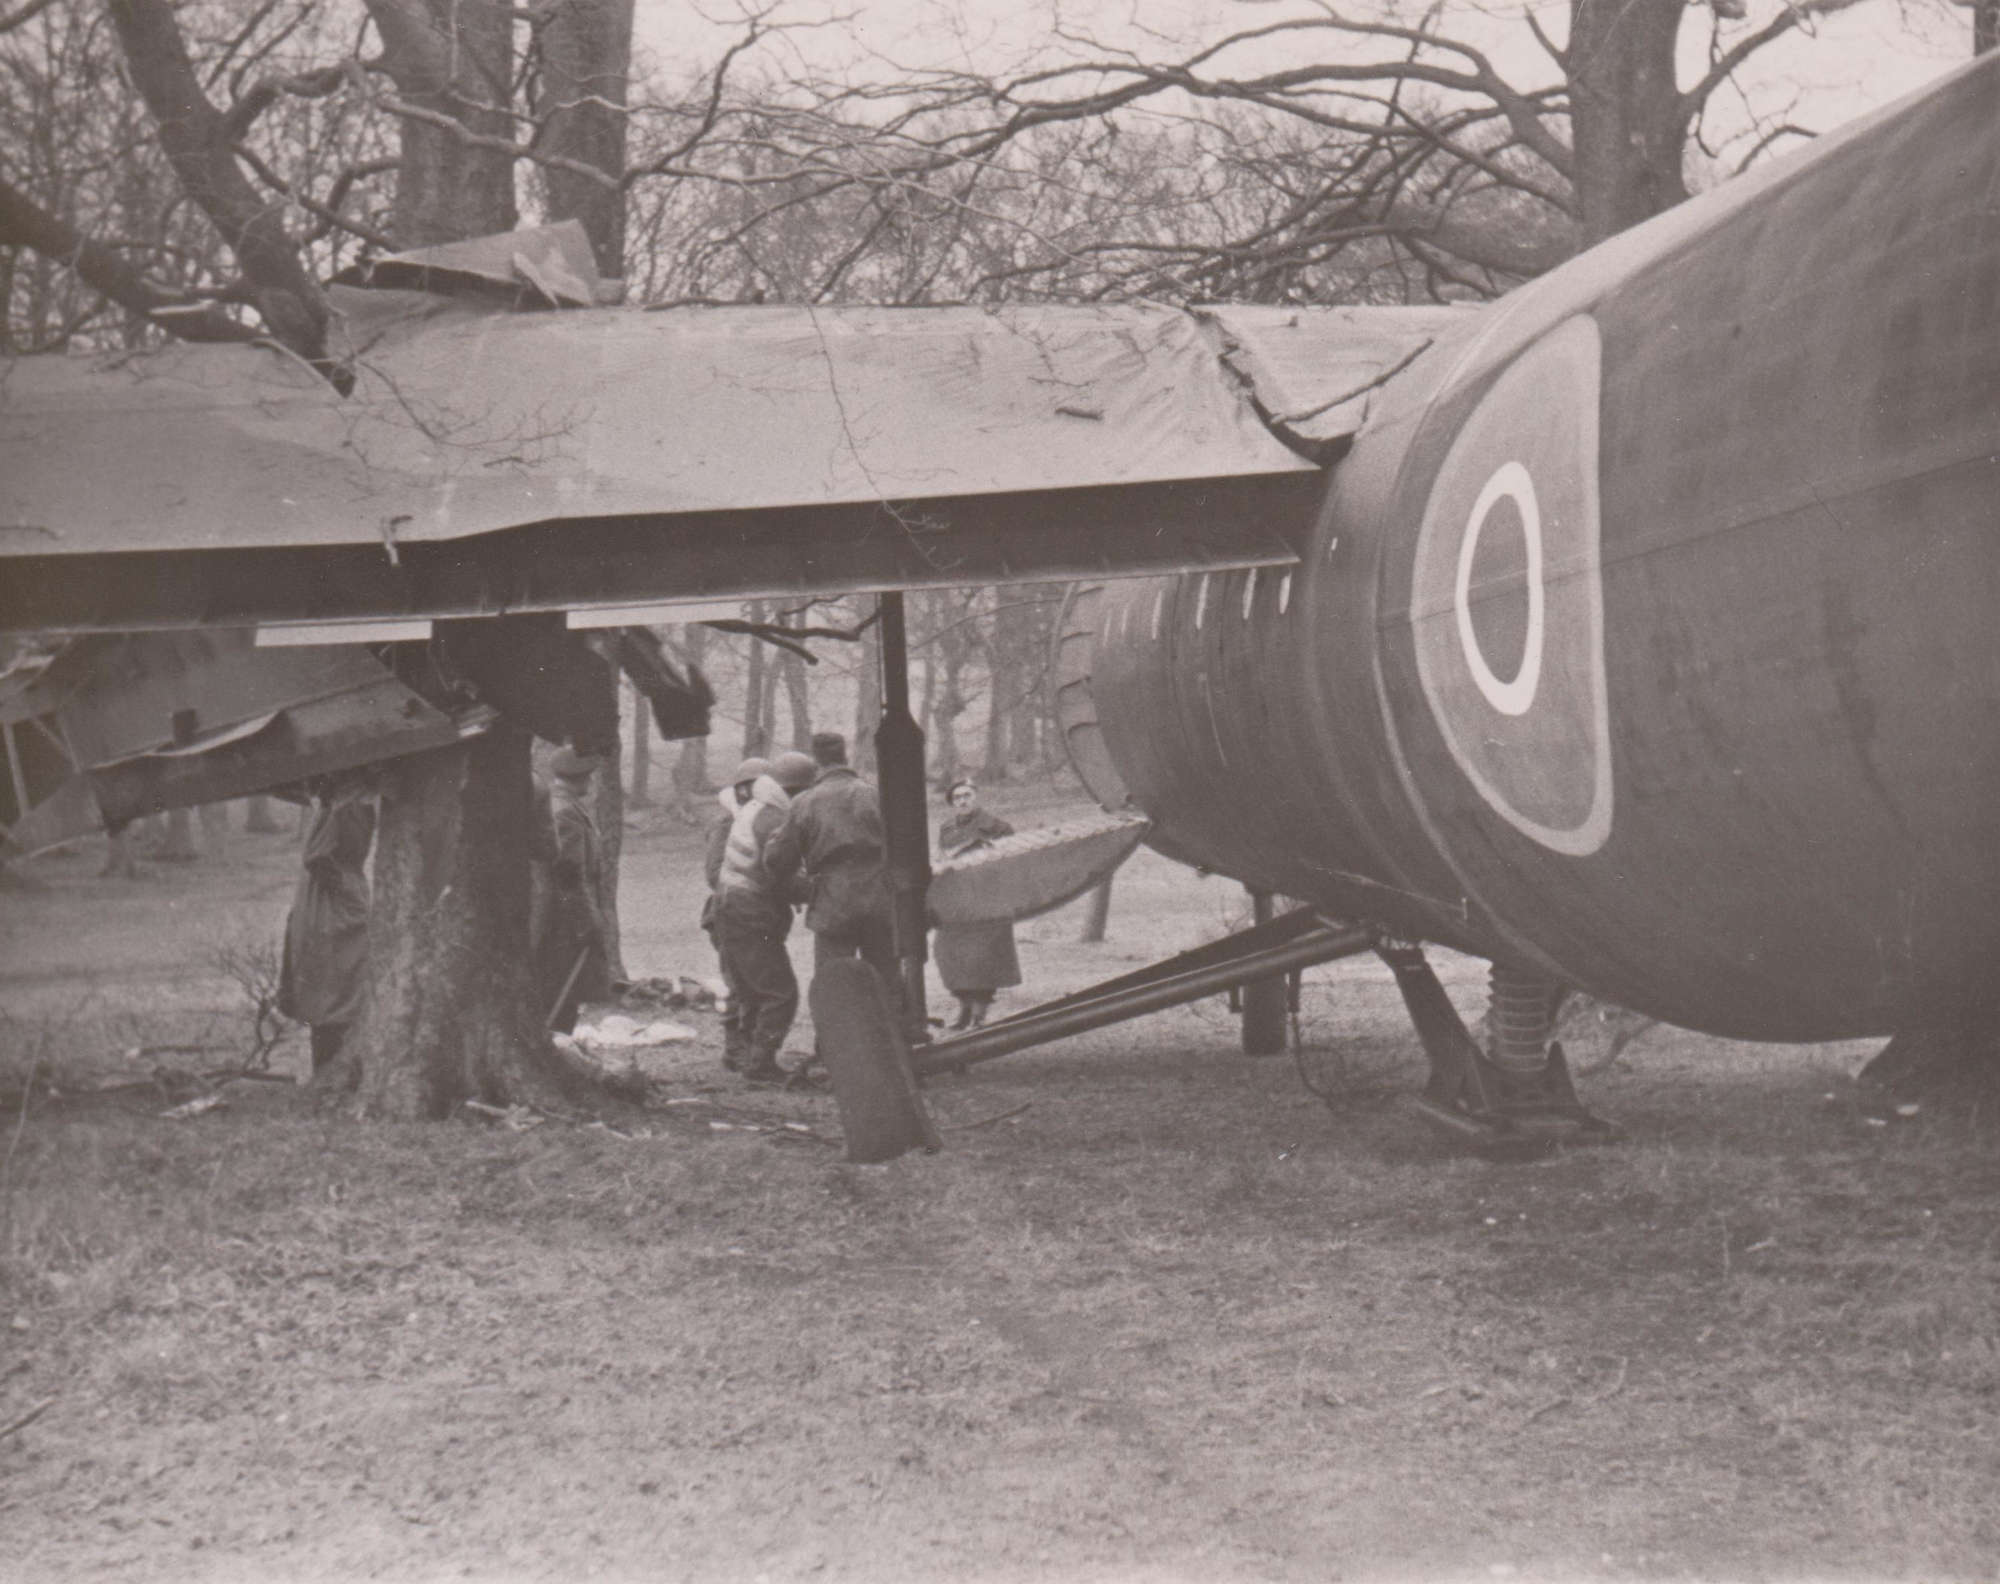
A Horsa glider that has crashed into trees on an exercise in England. 1943-44. Courtesy of Airborne Assault Museum, Duxford.
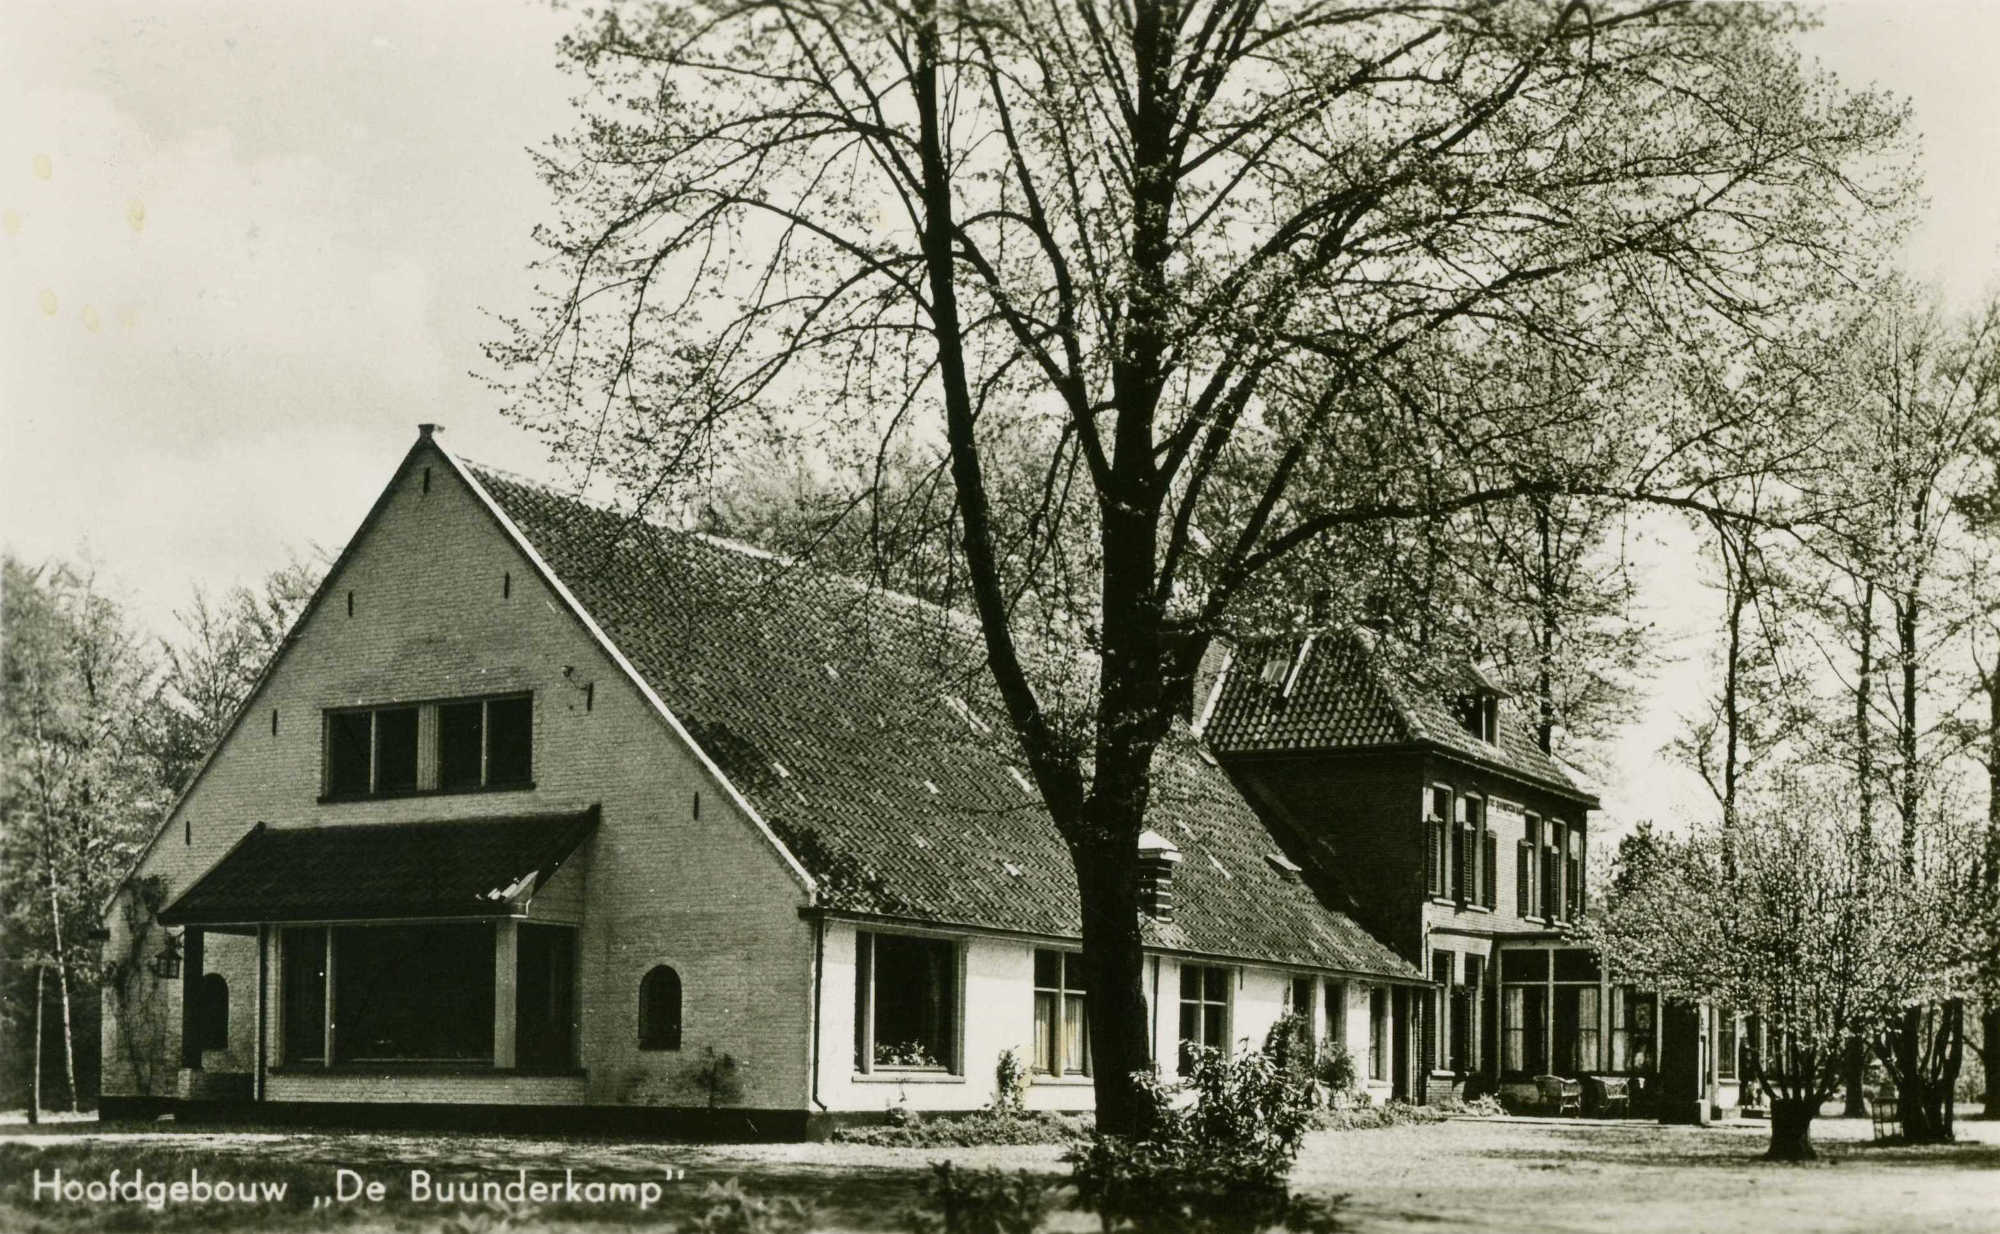
Hotel Buunderkamp, Wolfheze, circa 1940's. Courtesy Bob Hilton Collection.
Maj. Clark must have taken L/Cpl. White and Dvr. Thompson with him, in the Jeep, to Arnhem Bridge, as they were both listed as being taken prisoner there. L/Cpl. Clay and Dvr. Stubbs, were probably supposed to 'man' the R.V. for the Second Lift.
Horsa glider No 265, with a Jeep, 2 x trailers and 3 men, took off from R.A.F. Broadwell at approx. 10.30 hrs, piloted by men of 'F' Squadron, The Glider Pilot Regiment, and towed by a Dakota aircraft of 437 Squadron, R.A.F. Glider 265 had its load changed over at the last minute, and failed to reach the Landing Zone. "The first glider in trouble was, by pure coincidence, the glider towed by the lone 437 Squadron Dakota: Chalk Number 265. This 437 Squadron Dakota, lost its Horsa due to a broken tow rope right after take off. Regrettably, the precise details of this abortive sortie were never recorded in either the 437 or 512 Squadron Operations Record Books nor were the names of the glider pilots recorded on the 'Accident Record Card' of this event. There was however, a witness of this event; Warrant Officer Elliott, a pilot from 575 Squadron: "On the 17th of September I was lined up on the runway ready to have my glider attached to my Dakota when unfortunately, the tow-rope of a glider, which had just previously taken off, had broken and it came back to land trailing this broken cable. It struck my aircraft and smashed the cabin so I had to pull away and miss the flight".
The above information of Warrant Officer Elliot indicates that '265' was not the last glider to leave RAF Broadwell. It is believed that the load of Chalk Number 265 was changed at the last moment and that the RASC load of a jeep, two trailers and three troops, was replaced by men and materiel of the 1st Battalion, the Border Regiment. It is quite possible that the 437 Dakota was lined up in the 512 Squadron 'Border serial'. This assumption is based on additional information: "One glider carrying the 6-pounder anti-tank gun 'Suvla Bay' and its detachment under the command of Sergeant Tom Bate, failed on take-off. The soldiers were able to take-off in another glider, but the gun had to be left in England, the only one of the eight not to arrive in Holland".
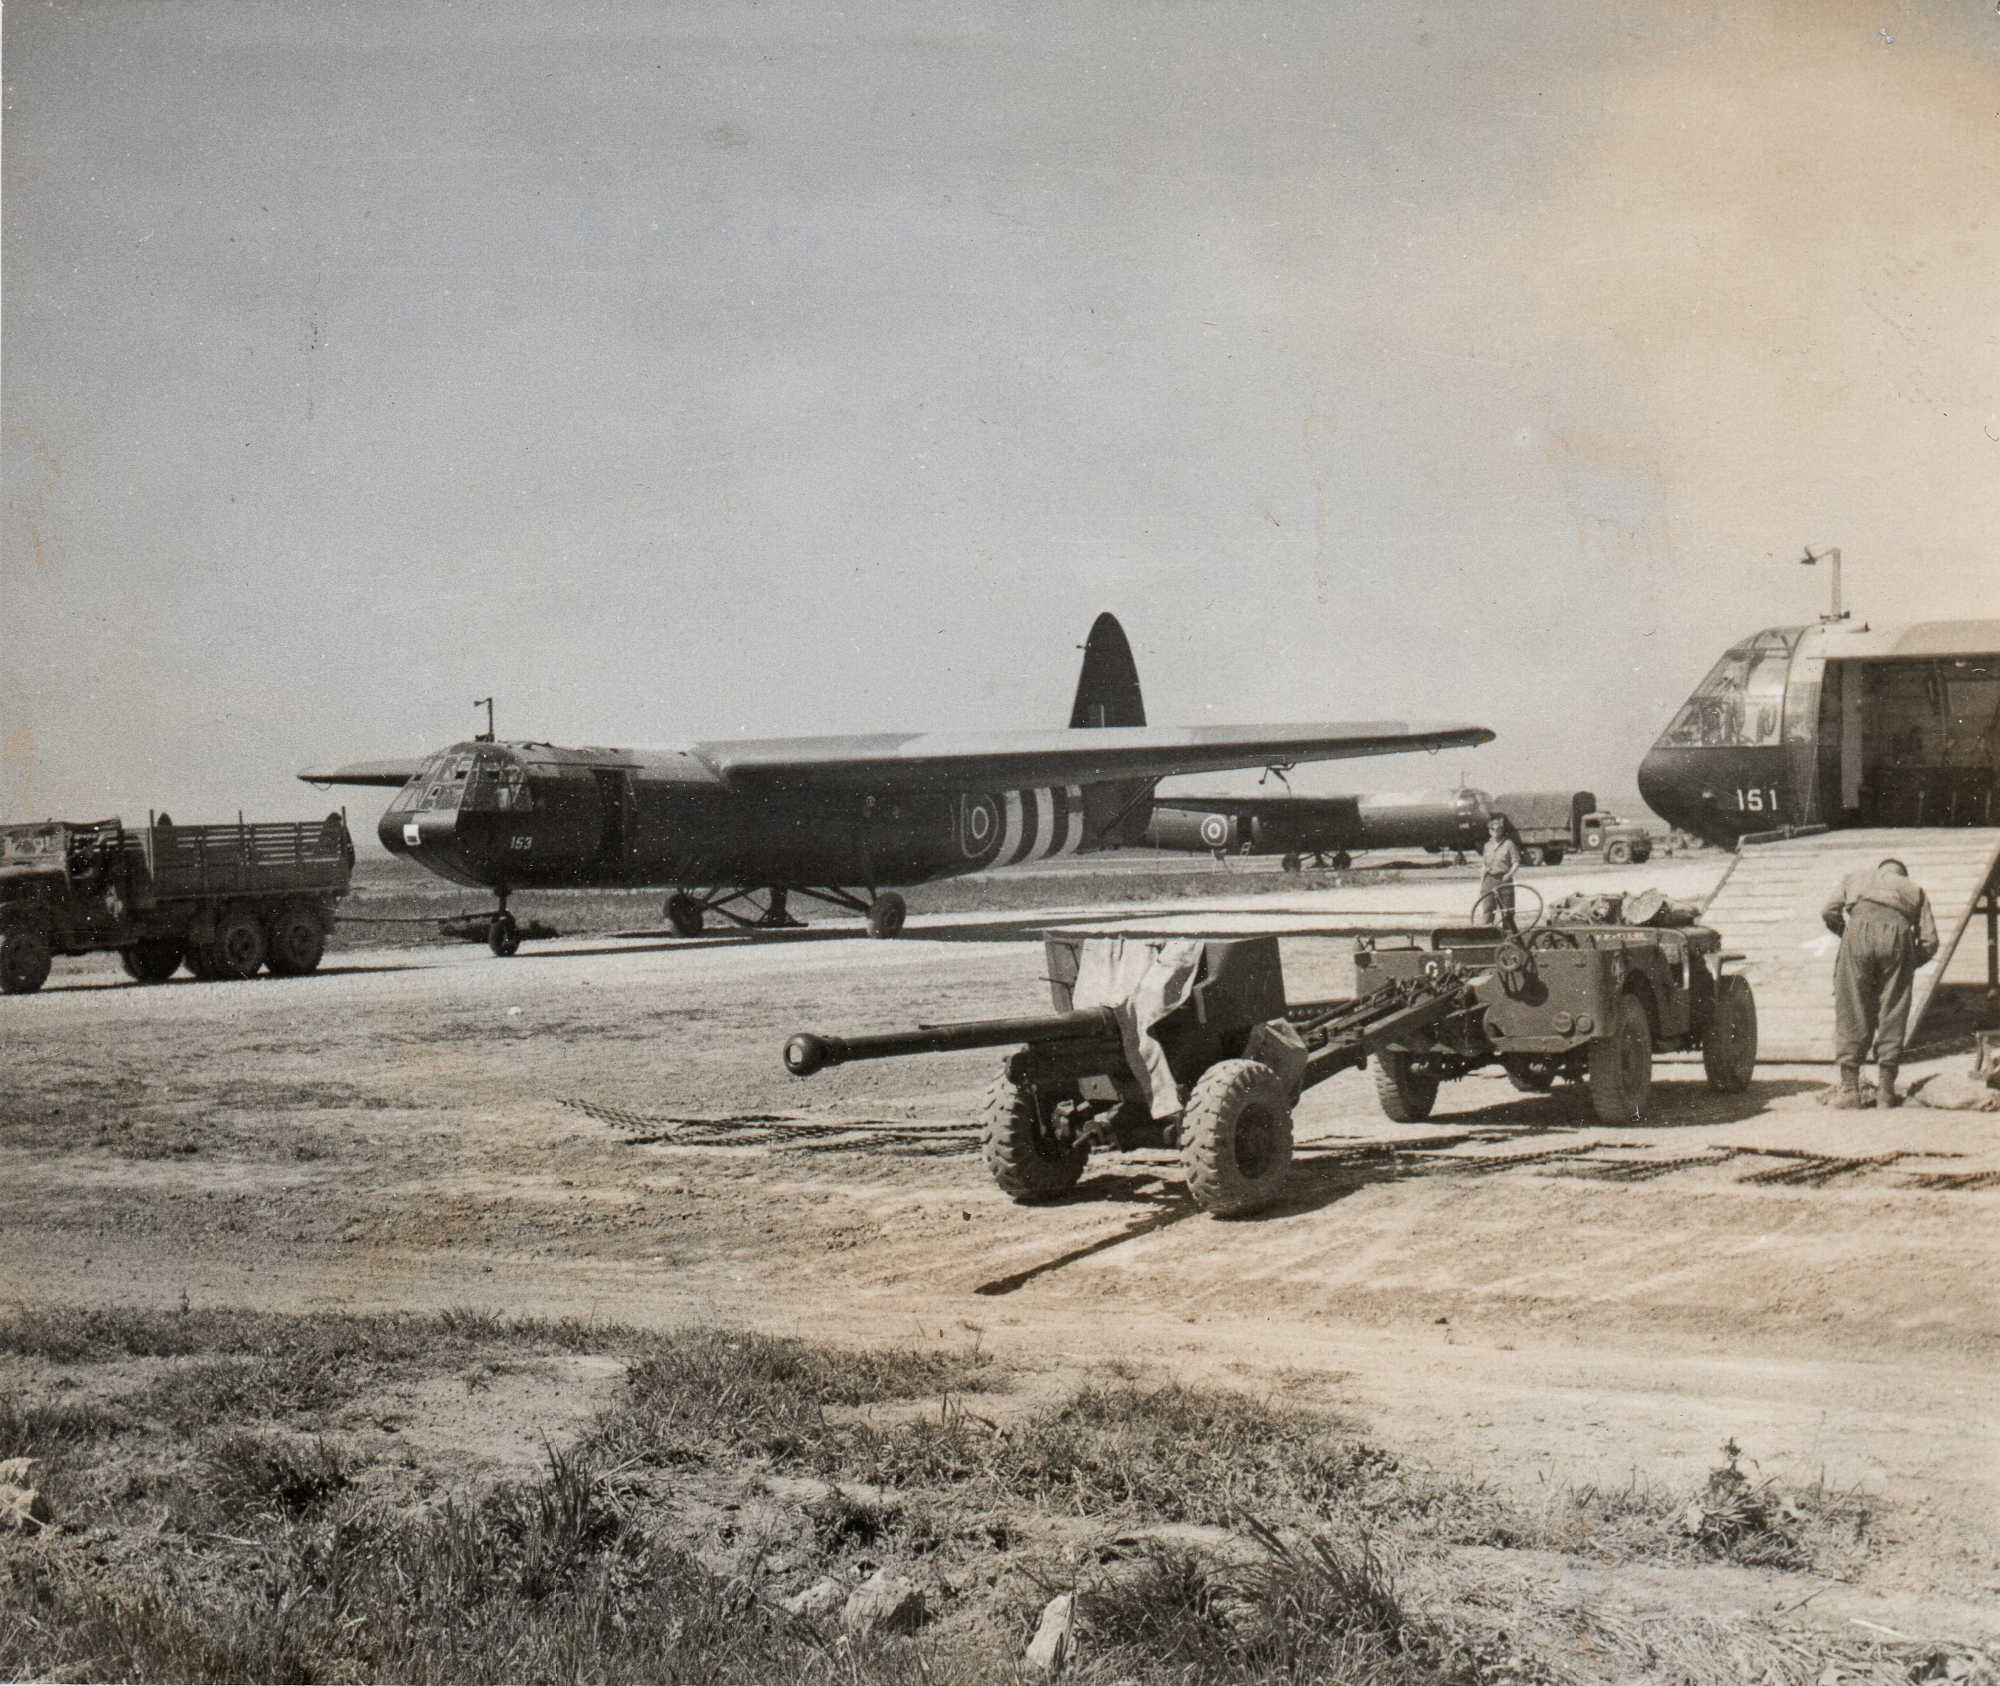
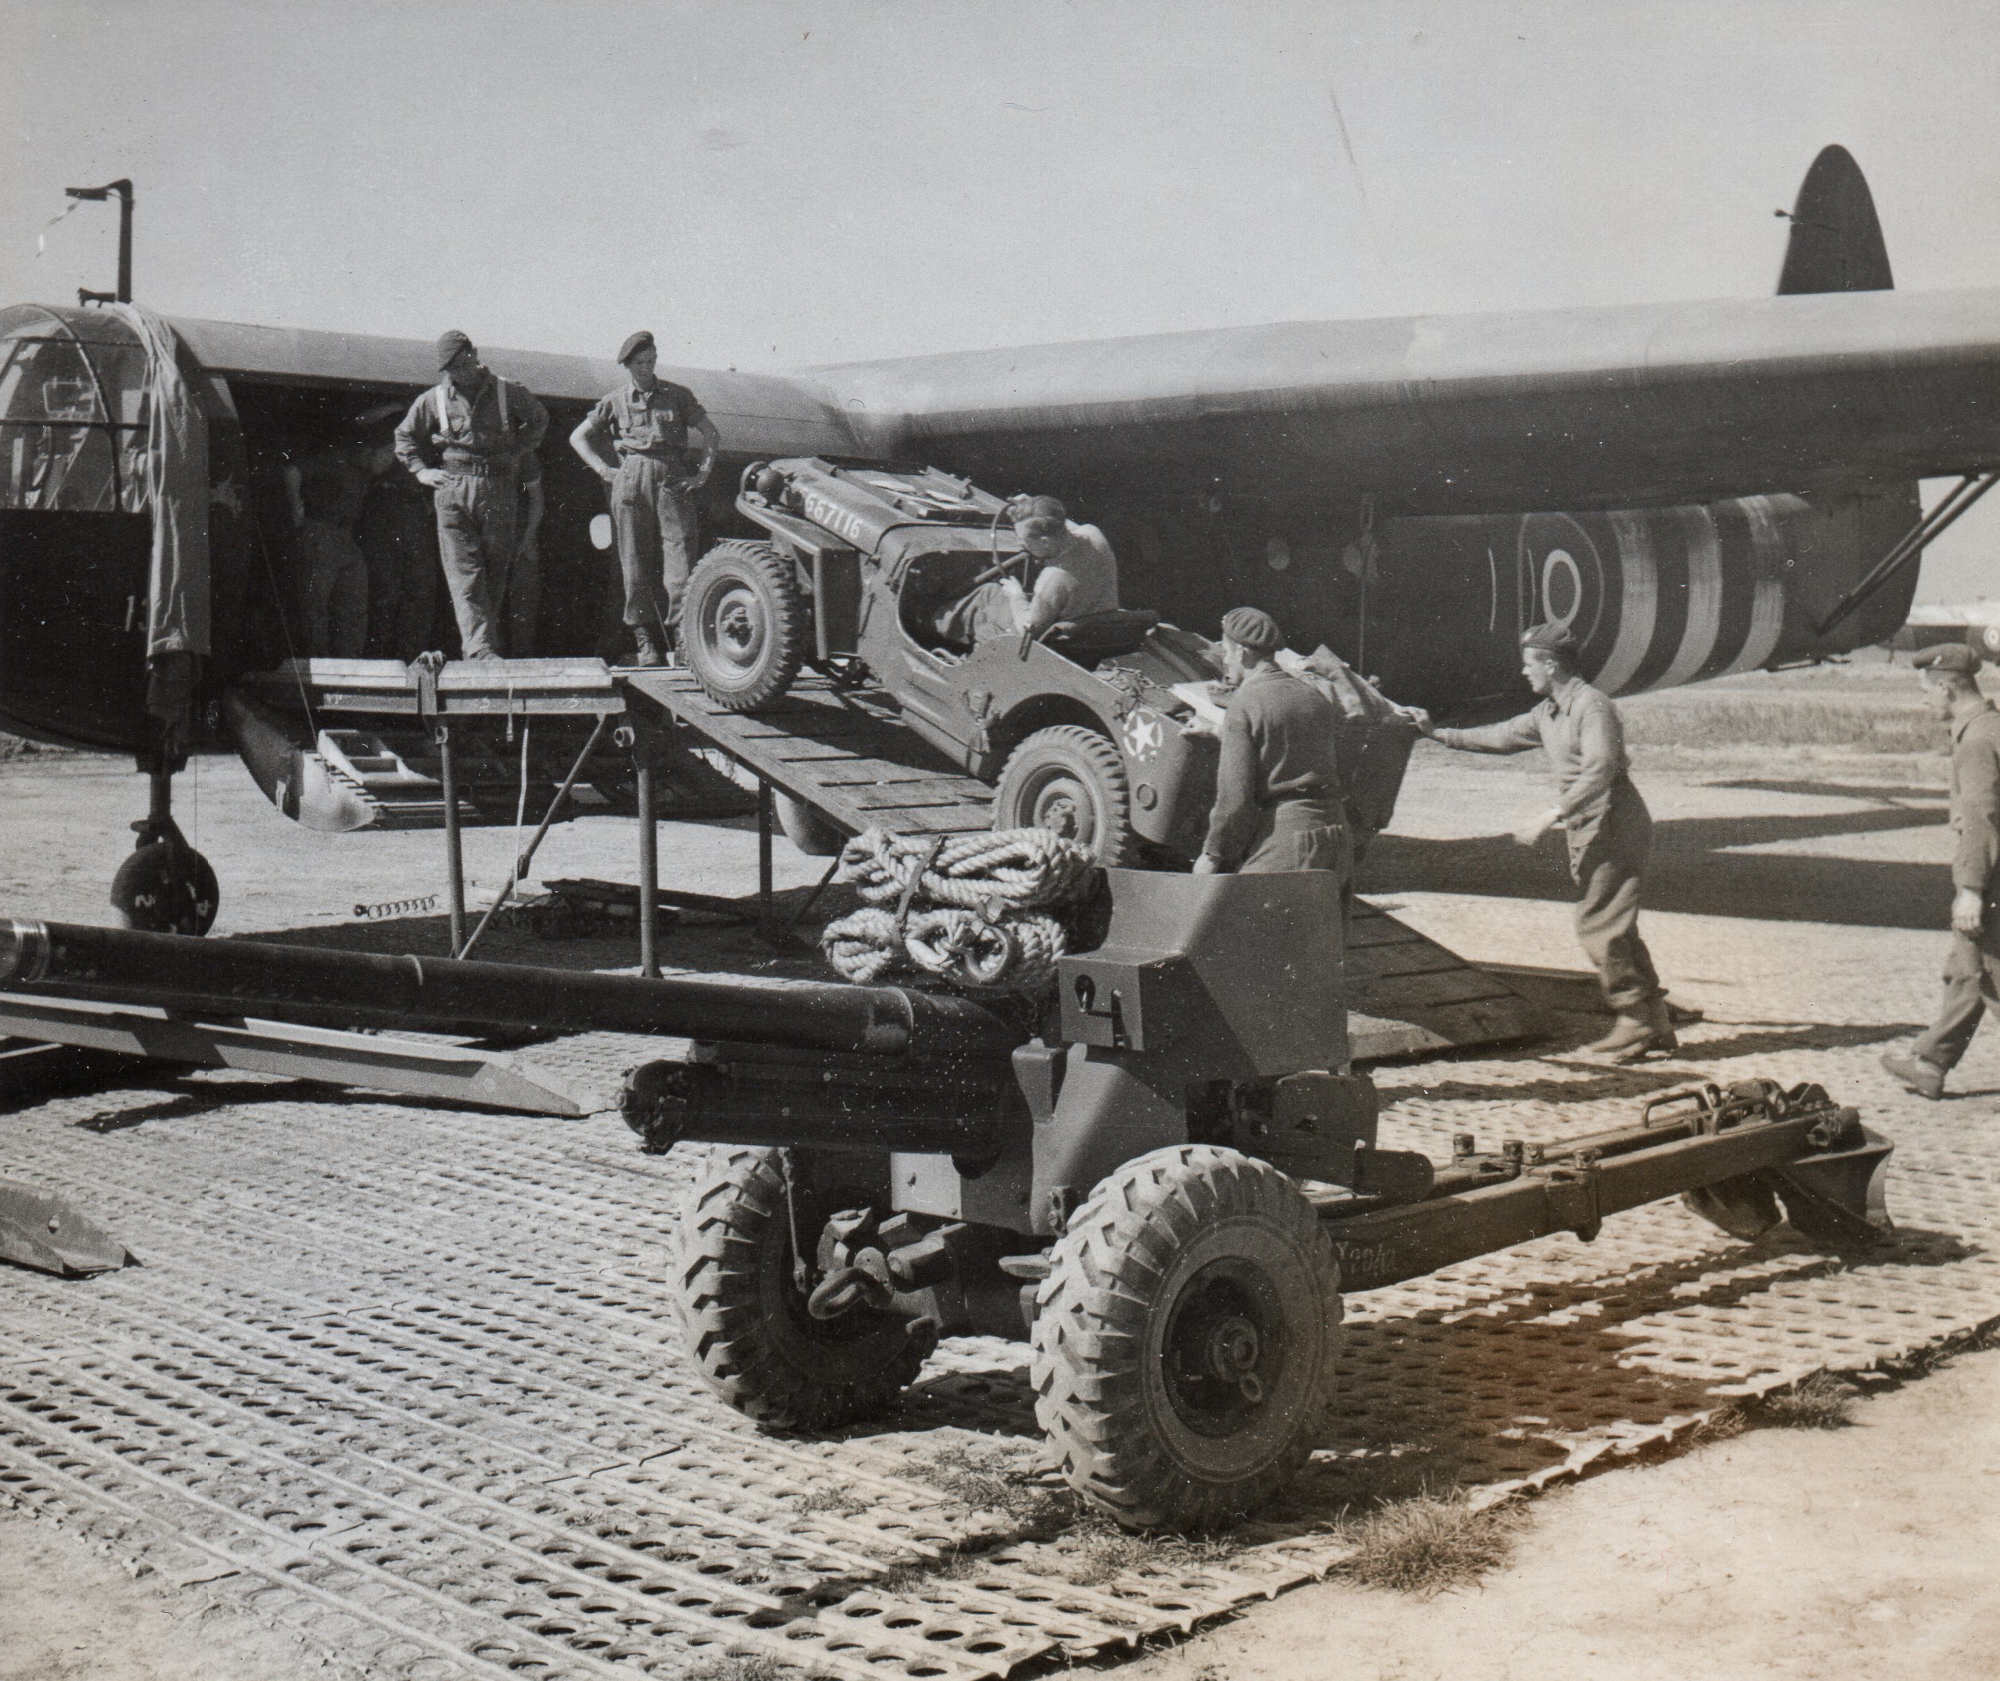
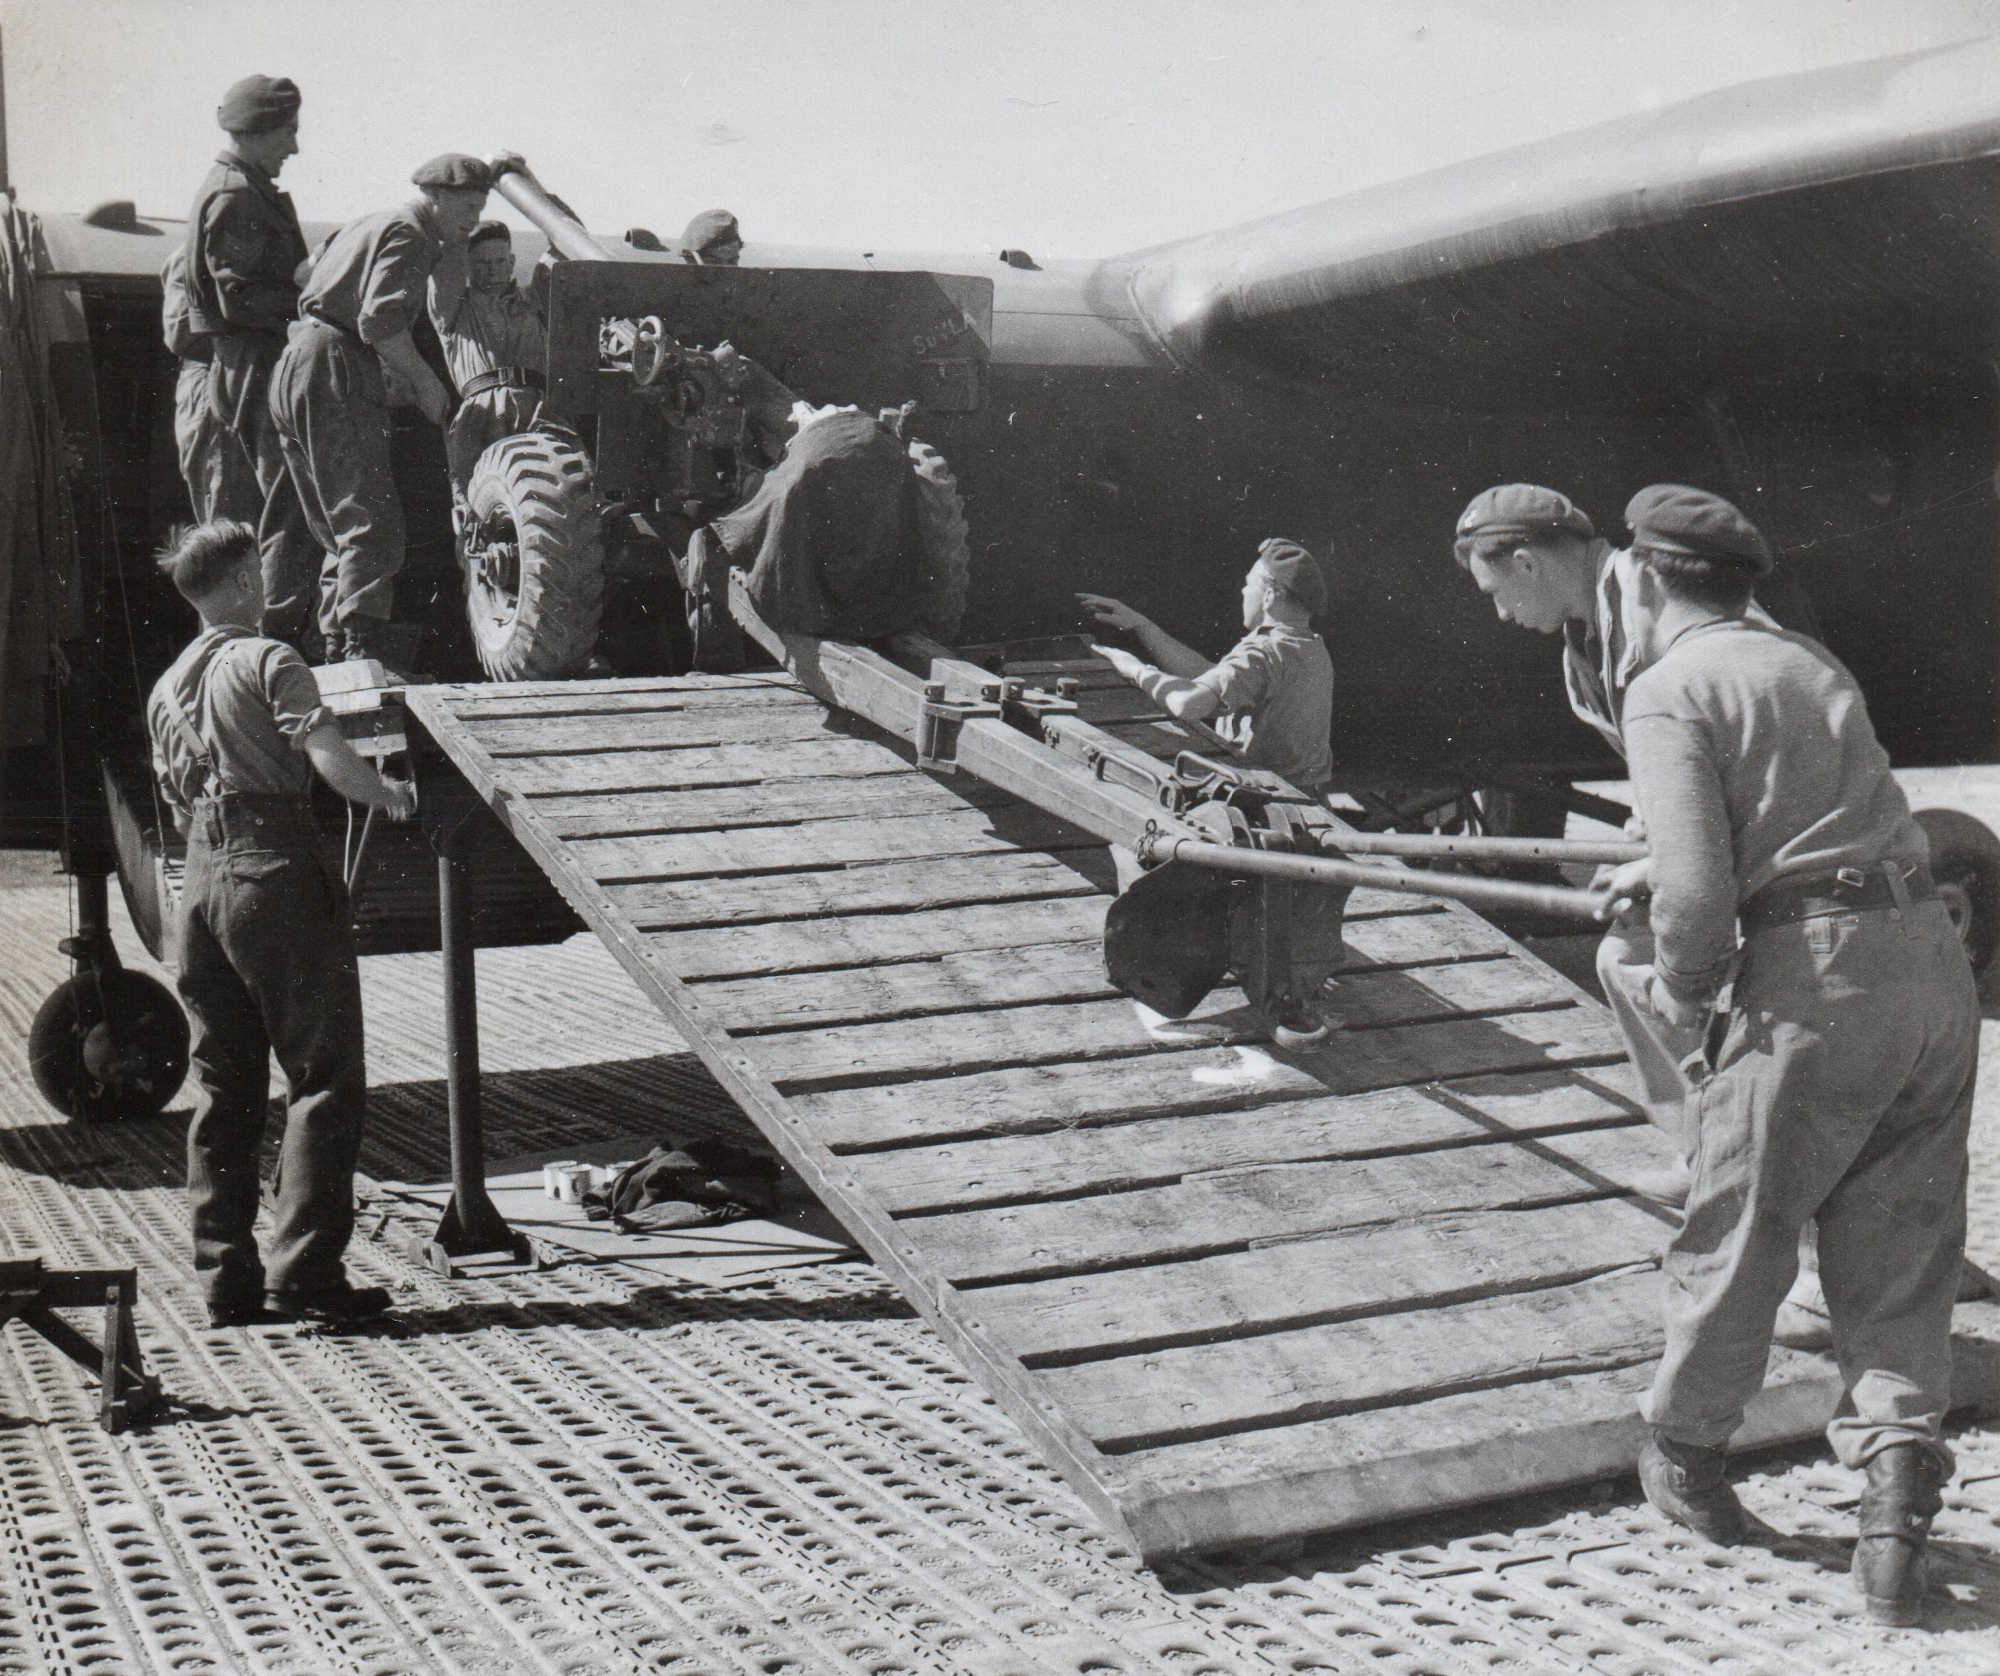
A sequence of photo's showing a 6-pounder anti-tank gun and Jeep being load aboard a Horsa glider in 1944. Courtesy of Airborne Assault Museum, Duxford.
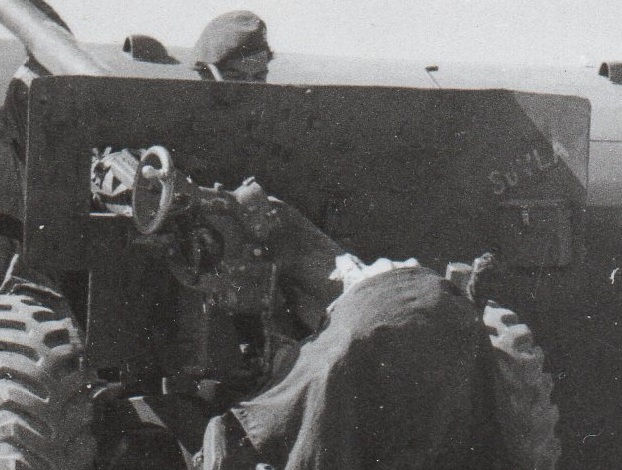
A close up of the inside of the gun-shield - the word SUVLA can be seen - is this the 1st Bn, The Border Regiment 6-pounder anti-tank gun that had to be left behind from Horsa C/N: 265? Courtesy of Airborne Assault Museum, Duxford.
Having landed near the airfield boundary the artillery men of the Border Regiment quickly hitched a ride in another Horsa which was still awaiting its turn to take off.
S/Sgt. Peter Aitken is believed to be the glider pilot of Chalk Number 265. "I was in F-Squadron No. 16 Flight and my co-pilot was Sergeant Frank Taylor. Our take-off airfield was Broadwell and we took off on the 17th of September with 3 members of the KOSBIES. We landed in a ploughed field due to tow rope failure". These details fit with the facts as related above, but the unit was the 1st Bn, The Border Regiment, not the 7th Bn, The K.O.S.B. who hated being called KOSBIES!
All the glider serials, on this day, landed between 13.15 and 13.30 hrs. This was followed by the parachute drop, which took place between 13.50 and 14.20 hrs.
It is not known which glider he was in, but Dvr. Jack Brooks remembers: "I was in 3 Platoon (Capt Gell) and my old mate "Freddie" Hill, who I was with when he was killed on the 21st September 1944. We had been together since 1941, and saw service in North Africa and Italy, and we were always attached to the 2nd Battalion. I was on the first drop with my Jeep and two trailers carrying ammo, 'Fred' Hill had the second Jeep and trailers, also with ammo. We were the only two Jeeps of 250 Company to get through to Arnhem, along with the rest of 3 Platoon." [3]
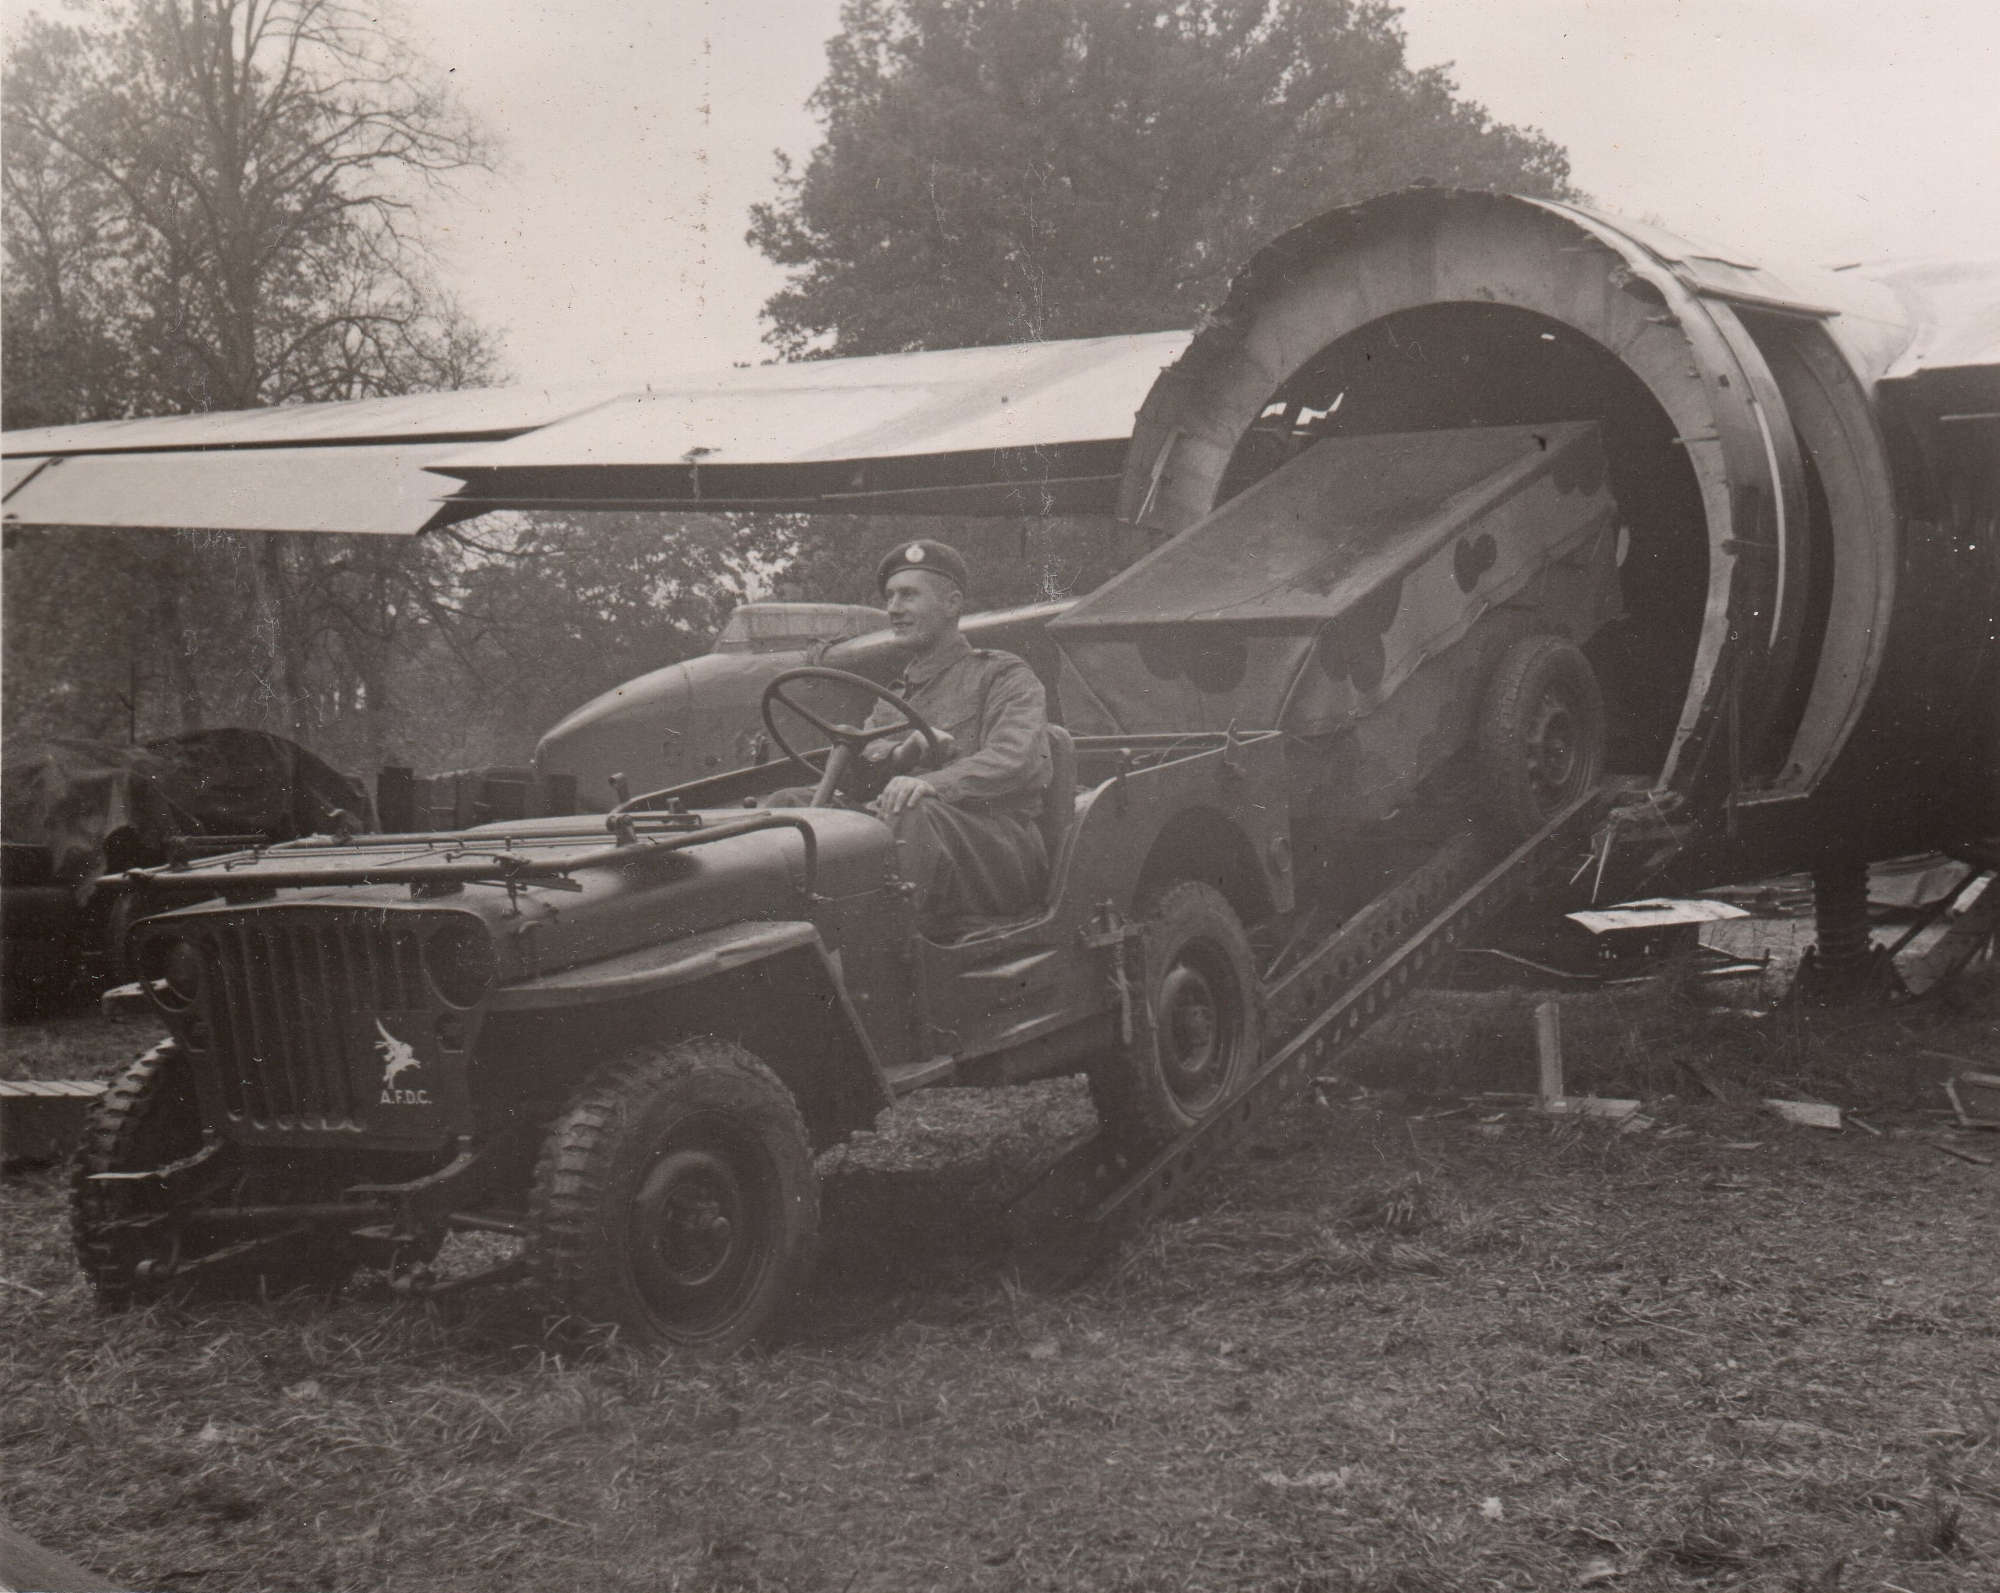
A jeep and trailer being driven out f a Horsa. A.F.D.C. November 1943. Courtesy of Airborne Assault Museum, Duxford.
Aircraft No 48 was part of Serial A24, flown by 32 Squadron, and aircraft No 84 was part of Serial A25, flown by 61 Squadron, both part of the 314th Troop Carrier Group, U.S.A.A.F. and operating with C-47 Dakota's from Barkston Heath aerodrome. They took off at 11.00 hrs, and No 48 dropped at 13.55 hrs, with No 84 dropping at 14.00 hrs. Capt. J.L. Cranmer-Byng: "Sunday 17th of September 1944 was a perfect sunlit day of early autumn, and the men who flew over East Anglia that morning in gliders and parachute planes remember how almost with pain, how peaceful and rich the fields of England were looking then. Yet at that time, they were confident and elated. They shared that excited feeling of relief that comes after long months of preparation and training are over, and at last the battle is about to begin."
Capt. Cranmer-Byng, and his No 1 Parachute Platoon dropped accurately onto Drop Zone 'X', but, being in two separate aircraft, with 36 other aircraft between them, they were quite spread out. Capt. 'Bill' Gell: "After landing at Arnhem my platoon was intact, and having landed by gliders was quickly, and fully operational. Shortly thereafter, I ran into Jack Cranmer-Byng, who told me that his platoon was somewhat scattered over the D.Z. As 1st Parachute Brigade H.Q., led by the 2nd Parachute Battalion, was already moving towards Arnhem we agreed to change places and I attached my platoon to the column." [4]
Capt. Jack Cranmer-Byng does not mention this incident himself, but in a letter that he wrote to the next of kin of his Platoon Sgt. John 'Jock' Walsh, he describes how: "When, finally, we landed at 1.45 p.m. on Sept 17th, he was in very high spirits, for everyone of the Platoon reached the collecting point safely after the drop. During that afternoon we worked tremendously hard collecting in the spare arms and ammunition which had been dropped in the area after we jumped." [5] Note that Capt. Cranmer-Byng got the time slightly wrong, but only by 10 minutes!
The wide dispersal of No 1 Parachute Platoon, and its difficulty in forming up quickly, is partly explained by Dvr. 'Ron' Nutley, who had been with the Company since 1942, and had served with it in North Africa; "Under light flak the Dakota dropped us over the DZ at 2 p.m. on Sunday 17th September 1944. You can gather what time it took and you can imagine the number of parachutes in the air at this time I think some 2, 000. I was in the middle of them. My landing was quite some way from the area originally allocated as the DZ which was marked by yellow smoke from canisters. I ended up some miles away in a field near some cow sheds. On landing, I removed my 'chute' and collected my gear. My Company were split up all over the place. I was in 'A' Platoon". [1] [5b]
Another, more recent member of No 1 Parachute Platoon was Dvr. James 'Jimmy' Cook. From Patrington in East Yorkshire, he had joined the Company in February 1944, and done a parachute course in March, before joining the platoon: "It was a grand sight that Sunday morning, when thousands of the Paratroop Division fell out of the skies around Arnhem. It made one feel kind of proud to belong to them. We knew we had a mighty stiff task before us, but we were full of confidence". [5c]
FOOTNOTE: [1] Notice the use of the term 'A' Platoon. This was frequently used by men that had served in the original 'A' (Airfield/Aircrew) Platoon, and had not 'adjusted' to the use of the new title - No 1 Parachute Platoon.
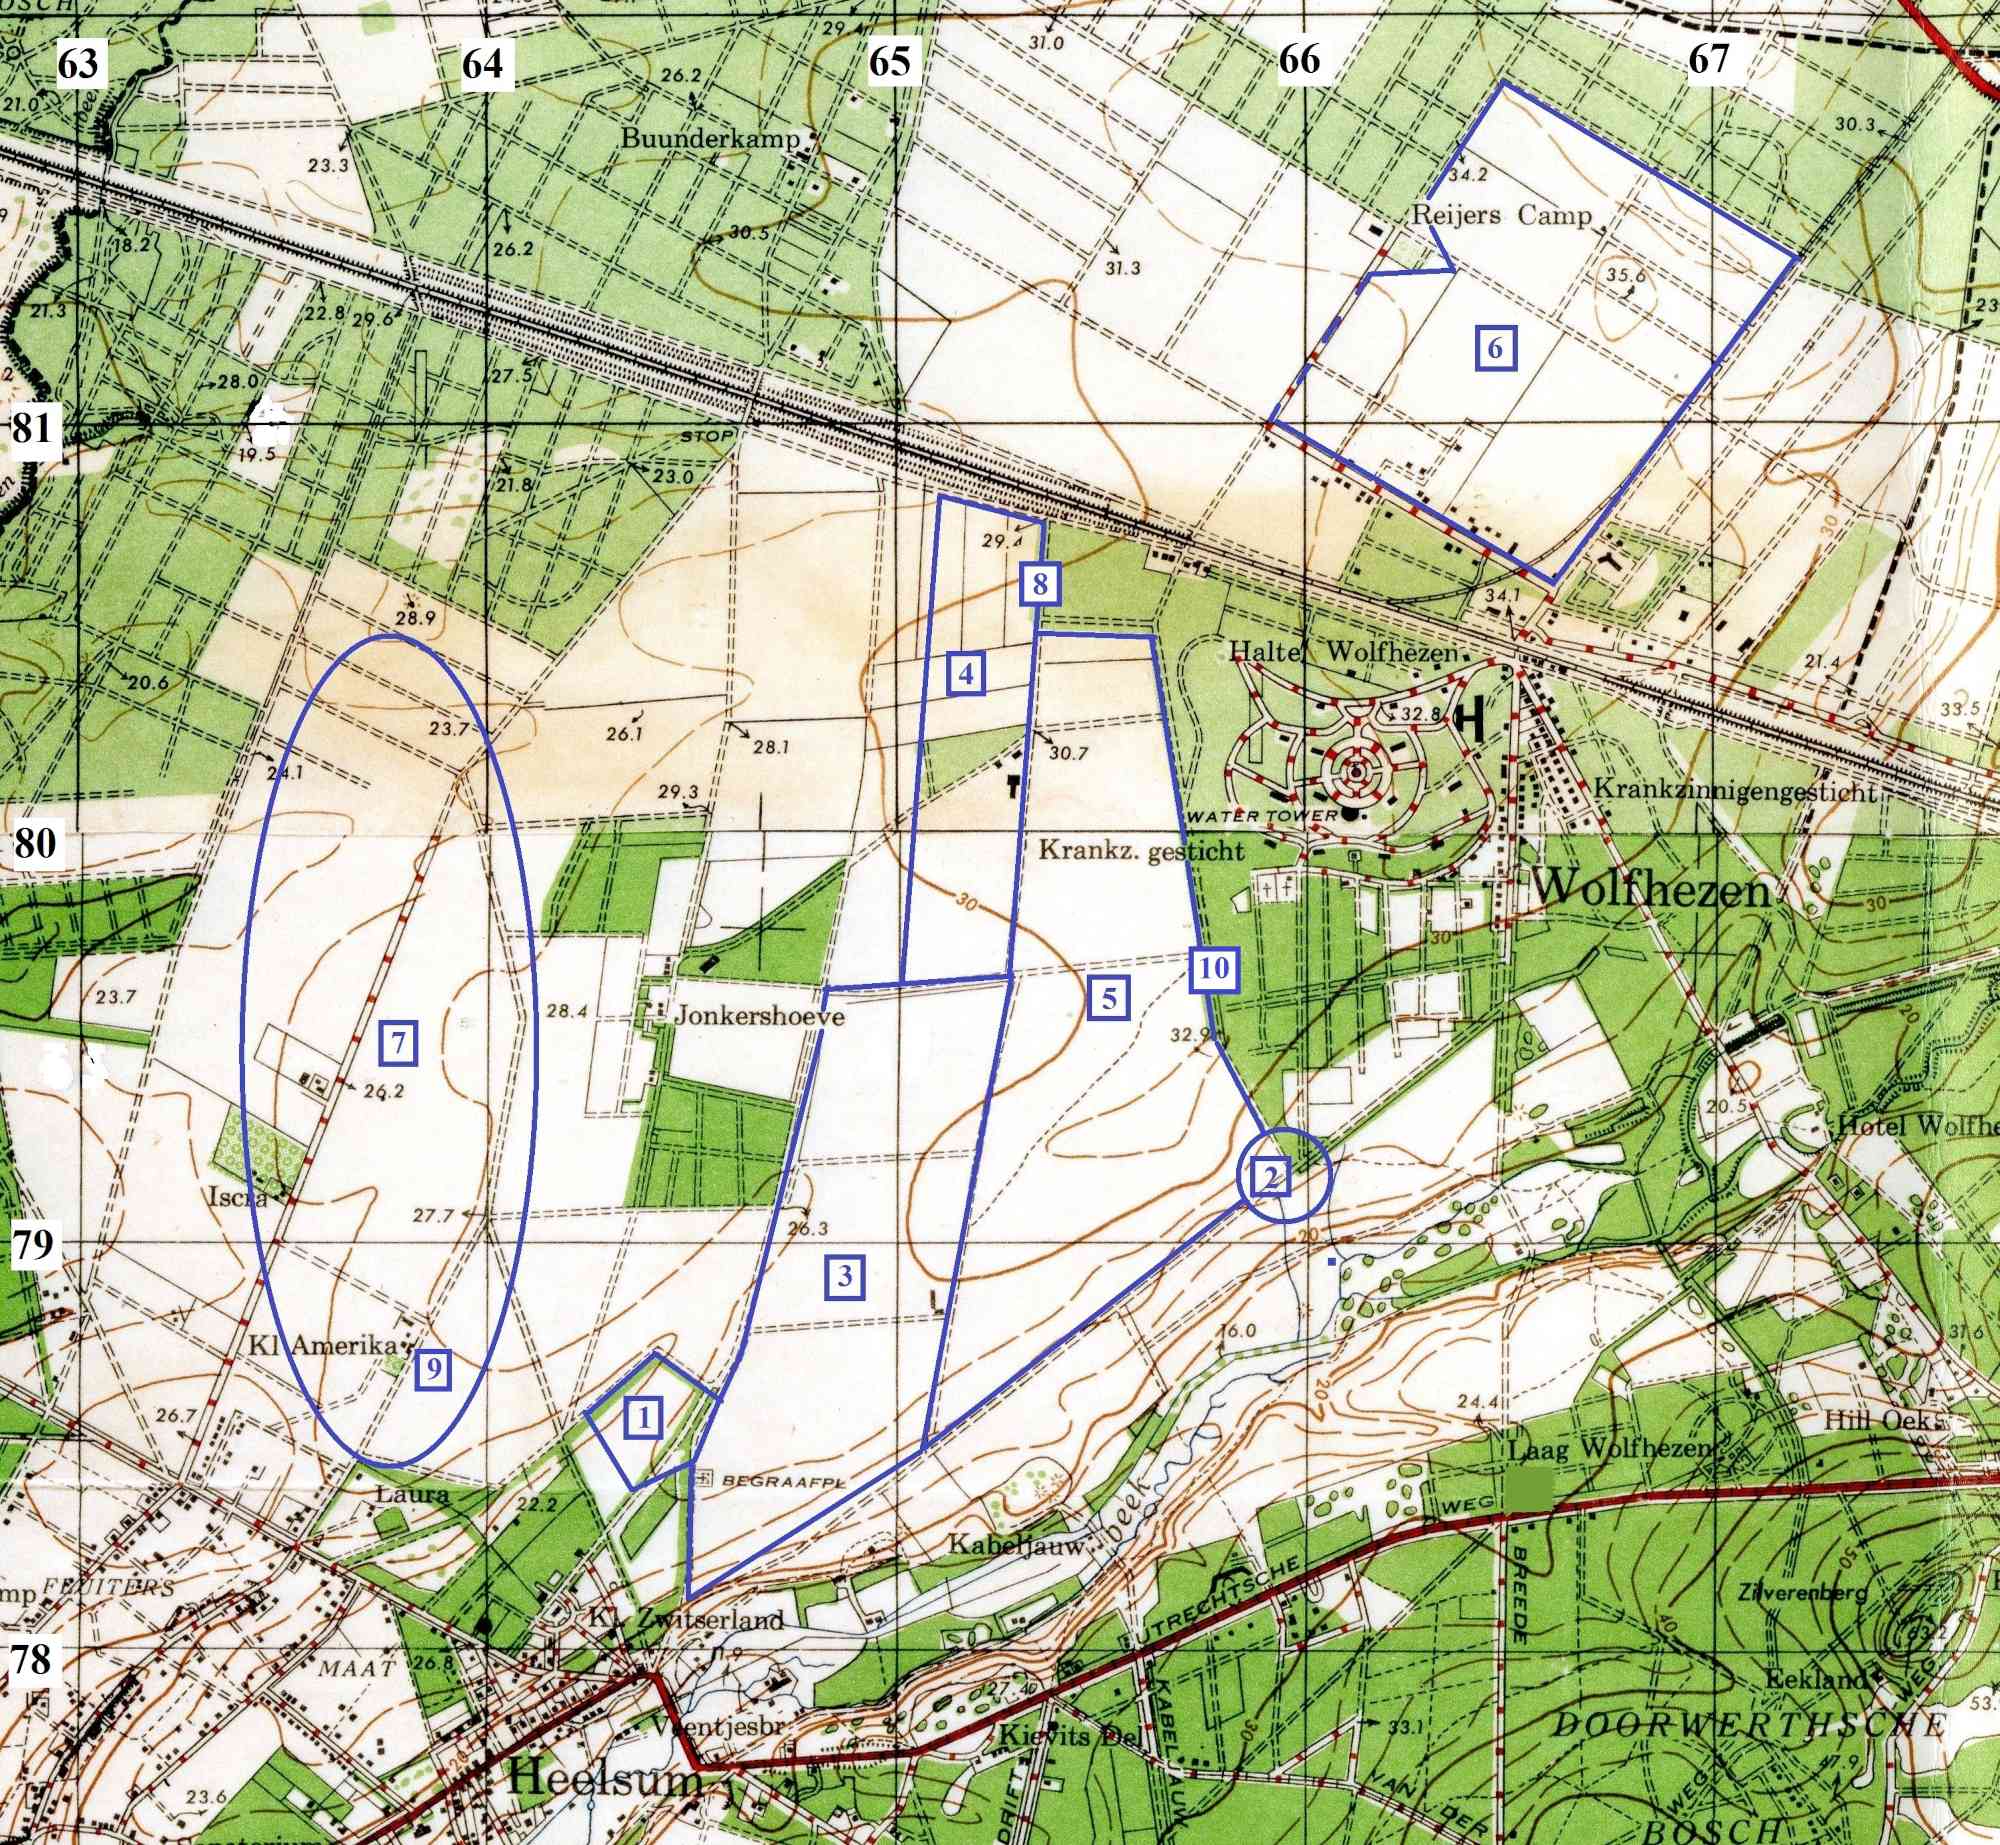
RASC, Landing Zone's and Drop Zone. 17th September 1944. KEY: [1] 1st Parachute Brigade Headquarters R.V. [2] 1st Parachute Brigade transport R.V. [3] Landing area for gliders from R.A.F. Keevil. [4] Landing area for gliders from R.A.F. Fairford. [5] Landing area for gliders from R.A.F. Tarrant Rushton. [6] Landing area for gliders from R.A.F. Broadwell. [7] Dropping Zone 'X'. [8] R.V. point for No 3 Parachute Platoon and Transport Section. [9] R.V. point for No 1 Parachute Platoon. [10] 1st Airborne Division Headquarters.
KEY TO MAP OF DZ/LZ AREA. Sunday, 17th September 1944.
[1] 1st Parachute Brigade Headquarters R.V.
[2] 1st Parachute Brigade transport R.V.
[3] Landing area for gliders from R.A.F. Keevil.
[4] Landing area for gliders from R.A.F. Fairford.
[5] Landing area for gliders from R.A.F. Tarrant Rushton.
[6] Landing area for gliders from R.A.F. Broadwell.
[7] Dropping Zone 'X'.
[8] R.V. point for No 3 Parachute Platoon and Transport Section.
[9] R.V. point for No 1 Parachute Platoon.
[10] 1st Airborne Division Headquarters.
The changeover of roles led to confusion. In the Orders for the 1st Parachute Brigade Headquarters, there is no specific mention of the tasks for No 1 Parachute Platoon, R.A.S.C. They had of course, been given very specific instructions in the H.Q., R.A.S.C. Orders, Section D:
(2) 1 Para Platoon.
(a) Land DZ 'X' and RV with 2 i/c, and contents of gliders 264 and 265 landing on LZ 'S', which will then come under his command.
(b) Move with 1 Para Brigade into Arnhem.
(c) Provide 2 i/c with requisitioning party as in para (1) (c) above.
(d) Remain under command 1 Para Brigade and carry out Brigade tasks allotted until 1200 hrs D+1 when he will revert to command C.R.A.S.C. and report to H.Q, R.A.S.C.
Notice there is no grid given for an R.V.
In the Orders for the 1st Air Landing Brigade Headquarters there is no specific mention of the tasks for No 3 Parachute Platoon, R.A.S.C. on Phase I. However, under the Admin Instructions at Section 21, is the following: Ammunition. Transport Platoon, Jeeps and trailers will be called to Brigade HQ in Phase II. Again, there were very specific instructions in the H.Q., R.A.S.C. Orders, Section D:
(3) 3 Para Platoon.
(a) Land LZ 'Z', RV and move up under command 1 A/L Brigade. Deliver trailer loads at Brigade HQ.
(b) As soon as possible, move into outskirts of ARNHEM, seize and occupy SDP and immediate neighbourhood. Establish R.A.S.C. Report Centre in Hotel Klein Wansborn. This Report Centre will subsequently become H.Q, R.A.S.C. and Report Centre D.M.A. on arrival of 2 i/c.
(c) As soon as possible, carry out requisitioning and commandeering of stores and installations as listed at appx 'A'. Moveable stores will be removed to D.M.A. Immoveable installations will be taken over and left under R.A.S.C guard. Any transport which may be incidentally encountered will be commandeered and removed to D.M.A, but requisition of transport is not the primary role of 3 Para Platoon.
(d) Confirm layout of D.M.A. and S.D.P. with 2 i/c.
(e) As from first light D+1, carry out collection of Compo from 1st lift gliders on LZ's 'S' and 'Z'.
(f) Before arrival of second lift, establish spotters on LZ 'L' on which 35 Stirlings are to drop. Arrange clearance of all stores from S.D.P. into D.M.A.
(g) On completion of this task, return to D.M.A. and await further instructions. R.V. H.Q, R.A.S.C. 1200 hrs D+1.
From the above, it will be seen that No 3 Parachute Platoons Transport Section was supposed to deliver its trailer loads to Brigade Headquarters which would be located at Wolfheze. Again, no specific grid is given.
It should also be noted here, that Maj. Clark and two gliders, were to land on L.Z. 'S' and drive South, whereas, the gliders of No 3 Platoon Transport Section were to land on L.Z. 'Z' and drive North!
It was the War Diary for the 1st Airlanding Brigade Headquarters, September 1944, that started the confusion when it stated: '171600. Transport Platoon, R.A.S.C. had been ordered to wood at 655806 but never appeared.'
This was compounded by the After Action Report in the same War Diary file, which states at Section (g): "Platoon R.A.S.C. They received conflicting orders from C.R.A.S.C and from this Brigade. Their orders from C.R.A.S.C were to go straight into the town and take over certain German petrol installations, etc East of the main road bridge. Their orders from this Brigade, under whose command they were and whose reserve ammunition they were carrying, were to RV at wood at 654807 and there to await further orders, the intention being to take over the ammunition and to release this platoon as soon as it was known that the road into the town was clear. The platoon did not appear at the RV and neither it nor the reserve ammunition, was seen again."
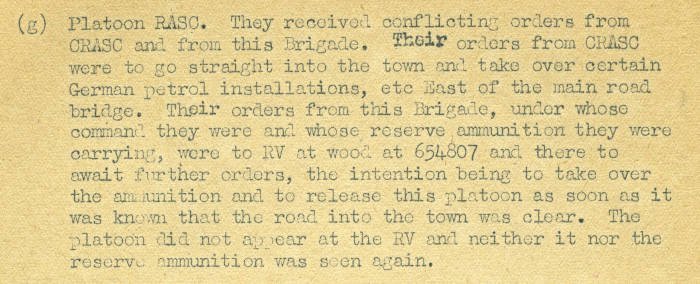
1st Air Landing Brigade Headquarters After Action Report. 17 September 1944, Section (g). Courtesy Bob Hilton Collection.
Firstly, note that the grid references in the two different sections are slightly different, which can only mean that the compilers were not working from a set of 'Orders'. And secondly, it is evident that the compiler of the After Action Report did not realise that there were two Platoons, each with a different task, which were swapped over, but as No 1 Parachute Platoon did not have its Transport Section, they could never have carried out the Orders of the 1st Air Landing Brigade.
Several drivers with Jeeps and trailers were detached from 250 Company to other units within the Division. At least two men did not arrive at their intended Landing Zone, L/Cpl. Kenneth Barnard and Dvr. Horace William 'Bill' Eggleton, were on board Horsa glider No 478, flying out of R.A.F. Keevil. Barnard was 24 years old, had enlisted on the 6th June 1940, and had then been posted to the Company in August 1940. Eggleton was 21 years old and had enlisted on the 21st January 1943, and had then been posted to the Company on the 16th April 1943, just in time to go to North Africa. Both were members of 'C' Transport Platoon.
This glider was assigned to 1st Parachute Brigade Headquarters, and was piloted by S/Sgt. Alan Cram and Sgt. James Whitehead of 13 Flight, 'D' Squadron, The Glider pilot Regiment, and towed by a Stirling tug aircraft of 196 Squadron, R.A.F. They were bound for L.Z. 'Z'. Also on board, were 2/Lt. J. Szegda, a Polish Liaison Officer, and Sgt. K. Lutweiler of No 2 (Dutch) Troop, No 10 (Inter Allied) Commando.
The glider suffered a broken tow rope and landed near the villages of Udenhout/Biezenmortel, seven kilometres north east of the town of Tilburg. After landing, the glider was unloaded with the help of civilians and the party decided to try to reach Arnhem by road, departing in the direction of Helvoirt. Meanwhile, the Germans in Biezenmortel had raised the alarm with the garrison of Helvoirt that two jeeps were coming in their direction. In the front jeep there was a Dutch guide, Mr. Oerlemans, at the time 16 years old. In the centre of the village of Esch, S/Sgt. Cram fell out of his jeep and he was taken prisoner by the Germans, 2/Lt. Szegda filed the following report: 'We landed near Udenhout, because the pilot had lost sight of the tug in cloud, and had cast off. Move off towards Grave - the six of us moved off in two Jeeps to get to Grave 6253 to join up with some U.S.A. Airborne, whose objective was to take the town.
On the way, we passed many Germans, quite a number of which we shot from the Jeep. As we proceeded, the enemy became more numerous and our ammunition would have given out, if we had fought a pitched battle, so I decided to turn off in the direction of Best 3726. While we were going round a corner in the village of Esch, 3137 at about 35 m.p.h, Sgt. Whitehead shouted to me to stop, but as he had a strong Lancashire accent, I could not understand what he intended to convey. We were in the second Jeep as Luitweiler, being a Dutchman, had been in charge of the leading Jeep, so that he could ask civilians for any information. What Sgt. Whitehead actually said was "My mate has fallen out of the Jeep". i.e. the one we were in, but as I could not understand clearly what he said I ordered the driver to carry on. It is presumed that S/Sgt. Cram is [a prisoner of war]. The Dutch later confirmed this. When we first started off we had taken a volunteer civilian with us in the leading Jeep, to guide us to Grave. Knowing that there were many Germans at one of the main cross roads, we decided to hide up in a wood 317377 and from here on our journey was arranged.'
This party of men joined up with others that had come down short of their designated landing areas and were hidden successfully in the Kampina Forest to the North-west of Eindhoven, between Tilburg and 's-Hertogenbosch, until the 24th/25th October 1944, when they linked up with advancing British troops.
If Capt. Gell, and his platoon had landed on the Western edge of area [3] on the map, they would have moved to the track nearest to them, and this is where he is likely to have met Capt. Cranmer-Byng, who would have been moving East, South-east off the D.Z. to the 1st Parachute Brigade H.Q. rendezvous point, area [1] on map.
The decision to swap their tasks around must have been made in light of the fact, that Captain Gell would have had at least one Jeep with him already (CN 480), and his complete platoon, with at least one other Jeep arriving shortly after, whereas Capt. Cranmer-Byng, was still waiting for his platoon to come into the R.V. or they were already collecting containers from the D.Z. They had no vehicles, these were not due until the next day.
It will never be known why Maj. Clark was not able to meet-up with either Capt's. Gell or Cranmer-Byng. It should be noted that in the Orders (see Appendix XIII) Capt. Cranmer-Byng and his Platoon were ordered to R.V. with Maj. Clark and the contents of glider 264 and 265 on L.Z. 'S' after their drop on D.Z. 'X', and they were then to come under his command. Capt. Gell was ordered to land on L.Z. 'Z', then after the R.V. area [8] on map, move under command of the 1st Airlanding Brigade, having delivered the trailer loads to Brigade Headquarters. Nevertheless, Maj. Clark made his own way into Arnhem, fought alongside the defenders of the Bridge, until overwhelmed and taken prisoner.
Maj. Clark was never able to carry out any of the other tasks that he had been ordered to do in the H.Q., R.A.S.C. Orders, which were, to travel in glider 264 from R.A.F. Broadwell and land on L.Z. 'S'. He was then to R.V. with the 1st Parachute Platoon and move with them into Arnhem, where he was to provide himself with transport (a strange order, as he would already have his own Jeep!). In Arnhem he was to assume responsibility for the early organisation of R.A.S.C. transport, and undertake the requisitioning of further transport within the town. He was to be provided with a requisitioning party for the purpose by Capt. Cranmer-Byng. All the transport commandeered was to report to Capt. Gell at H.Q., R.A.S.C.
He was also to visit the A.A. & Q.M.G. at the Tactical Divisional Headquarters, when it was established, and obtain the latest information about the tactical situation. He was then, to join the O.C: 3 Parachute Platoon in the D.M.A, and establish H.Q., R.A.S.C. and formulate the plan for the clearance of the S.D.P. and the layout of the D.M.A. He was also to recce the route for the 2nd lift from LZ 'X' to the D.M.A, and meet the 2nd lift at the R.V.
This leaves only the Jeeps, and crews of gliders 379 and 380. Unfortunately, it has not been possible to identify if these were able to link up with the rest of No 3 Parachute Platoon and then move into Arnhem, but it is definite that Dvr. Frederick William Hill was the driver for one of them that got through to the Bridge. Other members of the Jeep crews could include 2/Lt. Lawrence Eugene Daniells, Sgt. Arthur William Staples, Dvr's. Leonard Evans, Henry Ferguson, Edward Hall, Horace Hollands, and George Sidney Smith.
Capt. 'Bill' Gell and his Platoon moved off, "and apart from minor skirmishes, we reached the Bridge area on the evening of the 17th September. The whole of 3 Parachute Platoon got through to the Bridge on the evening of the 17th September, and that of course, included Lieutenant Daniells." [6]
Dvr. 'Jim' Wild: "We took off from Keevil at around 10.30 - 11 o'clock on the 17th September 1944. Our glider landed around 1.30 p.m. in the first half dozen to land. In the beginning, our Platoon was supposed to stay with units of the Air Landing Brigade, but, Captain Cranmer-Byng, in his wisdom, decided No 3 Parachute Platoon should go with the 2nd Parachute Battalion to the Bridge, and he, with No 1 Parachute Platoon would stay with the Air Landing Brigade. By the time we had received these orders, 2nd Para Battalion plus signals, and gunners were already on their way and at least 30 minutes in front of us. However, we caught the rear of the units up by the time we got off the L.Z. and on to the lower road. We brought up the rear all the way into Arnhem." [7]
When No 3 Parachute Platoon and its two Jeeps, with four trailers of ammunition got through to the Bridge they became another Defence Platoon for 1st Parachute Brigade Headquarters, and took no further part in any supply or re-supply tasks. Their journey, however, was not quite trouble free, Maj. 'Tony' Hibbert, Brigade Major, 1st Parachute Brigade Headquarters: "18.30 hrs. The situation from the Bde H.Q. point of view did not look too healthy. The enemy's reaction was rather more than had been expected and tanks and armoured cars had been reported. Bde H.Q. was strung out over some distance and included among its large numbers of unarmed medical personnel, odd German prisoners, which had accumulated up to about 40, and masses of M.T., and all the while the left flank was becoming increasingly exposed. As there was no sign of an immediate move forward I sent back a message to the column to dispose the R.E. and any other available troops (a Platoon of R.A.S.C. were used) on the left flank to prevent an attack from that side. By this time it was beginning to get dark." Later at approx. 20.45 hrs he states: "The 1 A/L Bde RASC Platoon under Capt. Gell, whose presence was a complete surprise to me, but a pleasant one, was ordered to occupy the house to the North, the one occupied by the Support Coy." [8b]
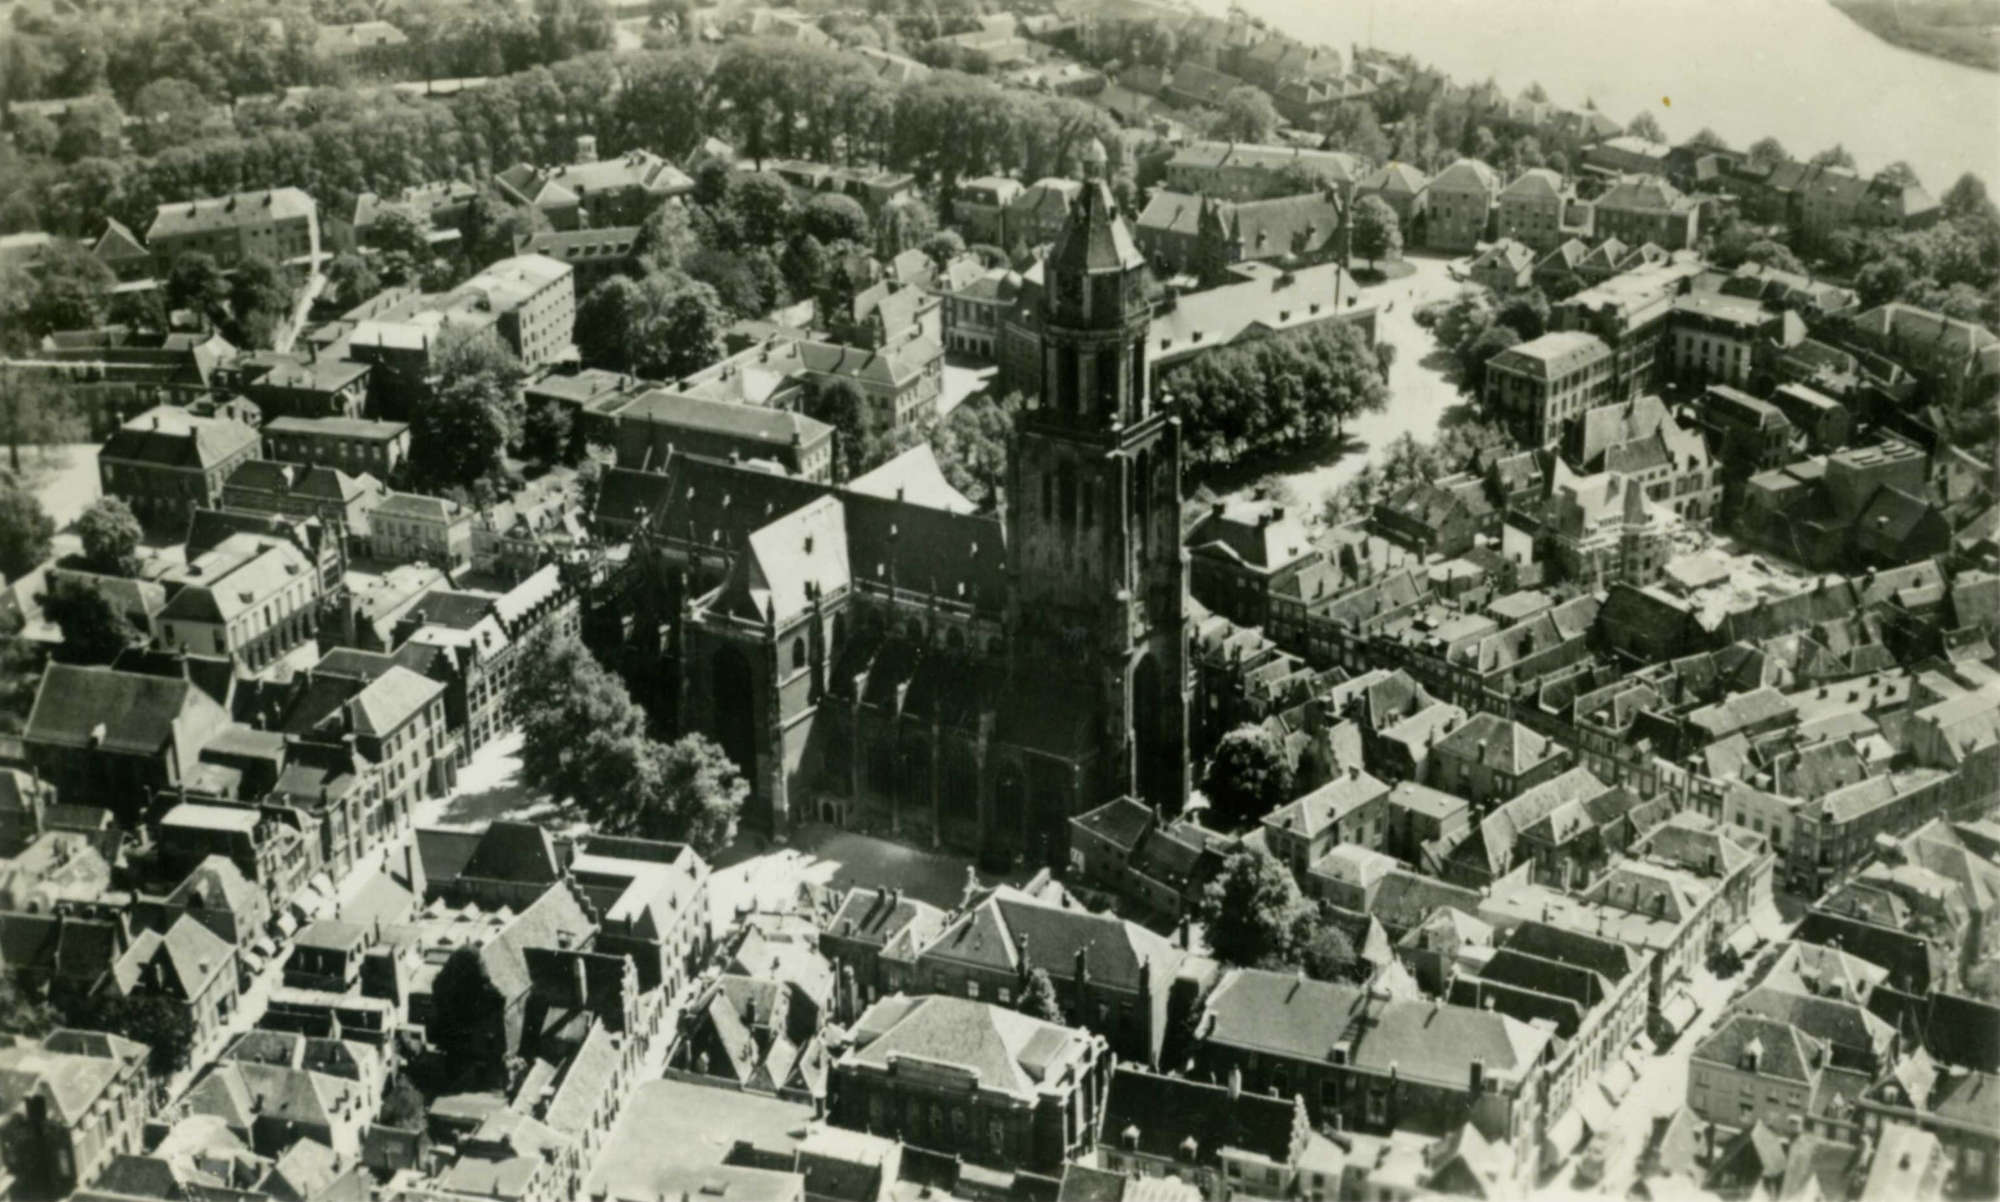
An aerial photo of the area round the Eusebius Church, looking towards the Lower Rhine. 1924. This was a K.L.M. photo and is taken before the construction of the Main Road Bridge. To the left of the tower, and this side of the line of trees is the 'old' Municipal Hospital, that then became a Public Works building. This side of it is the building held by No 3 Parachute Platoon. Courtesy the Bob Hilton post-card collection.
On the way past the Pontoon Bridge, the Germans were covering a small square, and firing across it with machine-guns, so men were split into small groups to dash over. The driver of one of the RASC jeeps was wounded, so the 25 year old Cpl. Douglas Beardmore, who had been serving with the Company since June 1942, went back, under fire, and drove the jeep, with its two vital trailers full of ammunition, to safety. [8c]
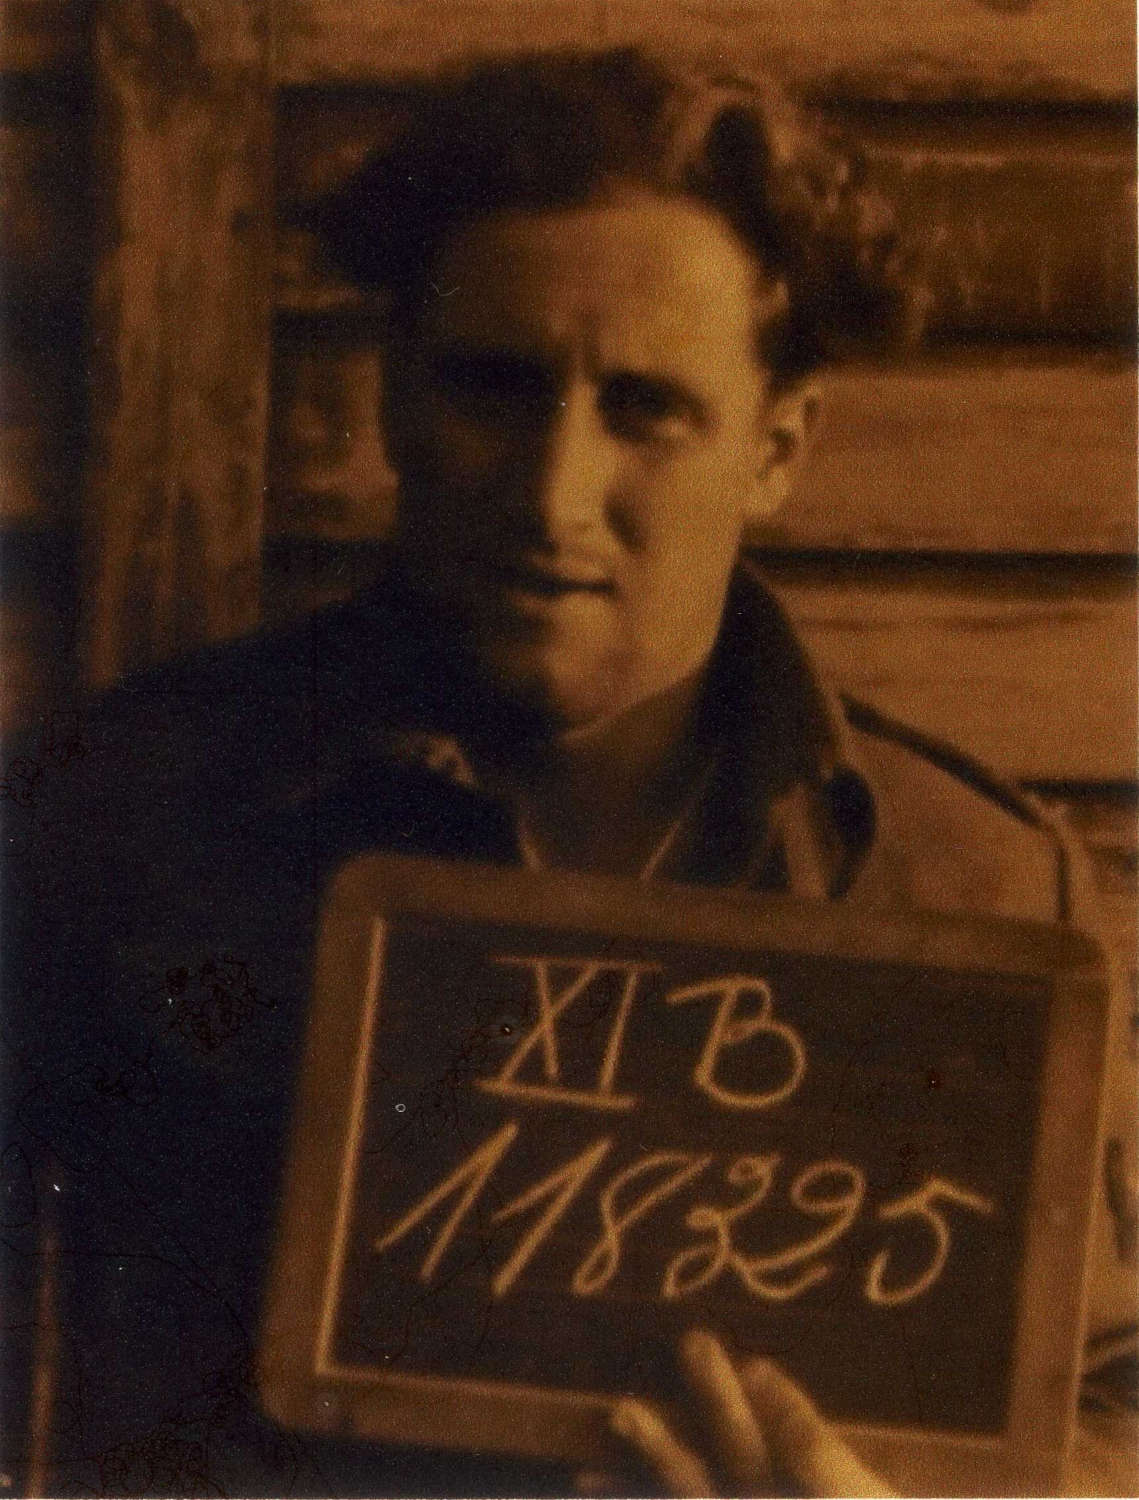
Cpl. Douglas Beardmore. No 3 Parachute Platoon. Photo taken on 06/10/44, whilst a POW. Courtesy of John Howes.
The soldier that was wounded was one of the youngest in the Company. Pte. Christopher Bedford Ineson was born on the 28th January 1925, and came from Batley in Yorkshire. He had enlisted on the 18th March 1943, and then been posted to the Company on the 4th March 1944. He was allocated to 'D' Transport Platoon, and was then attached to No3 Parachute Platoon as a member of their Transport Section. He was initially taken to St Elizabeth's Hospital, but later transferred to the temporary 'Airborne' hospital at Apeldoorn, before being transported, as walking wounded, on the 26th September 1944, to Stalag 11B, at Falingbostel in Germany. Another man that was captured at this time, was Dvr. Horace Hollands, who had also been wounded. Born on the 25th August 1917, and from Rochester, he had enlisted on the 2nd May 1939, and then joined the Company in February 1944. He was also sent onto Apeldoorn, and was then sent as walking wounded on the 26th September to Stalag 11B, arriving there on the 28th.
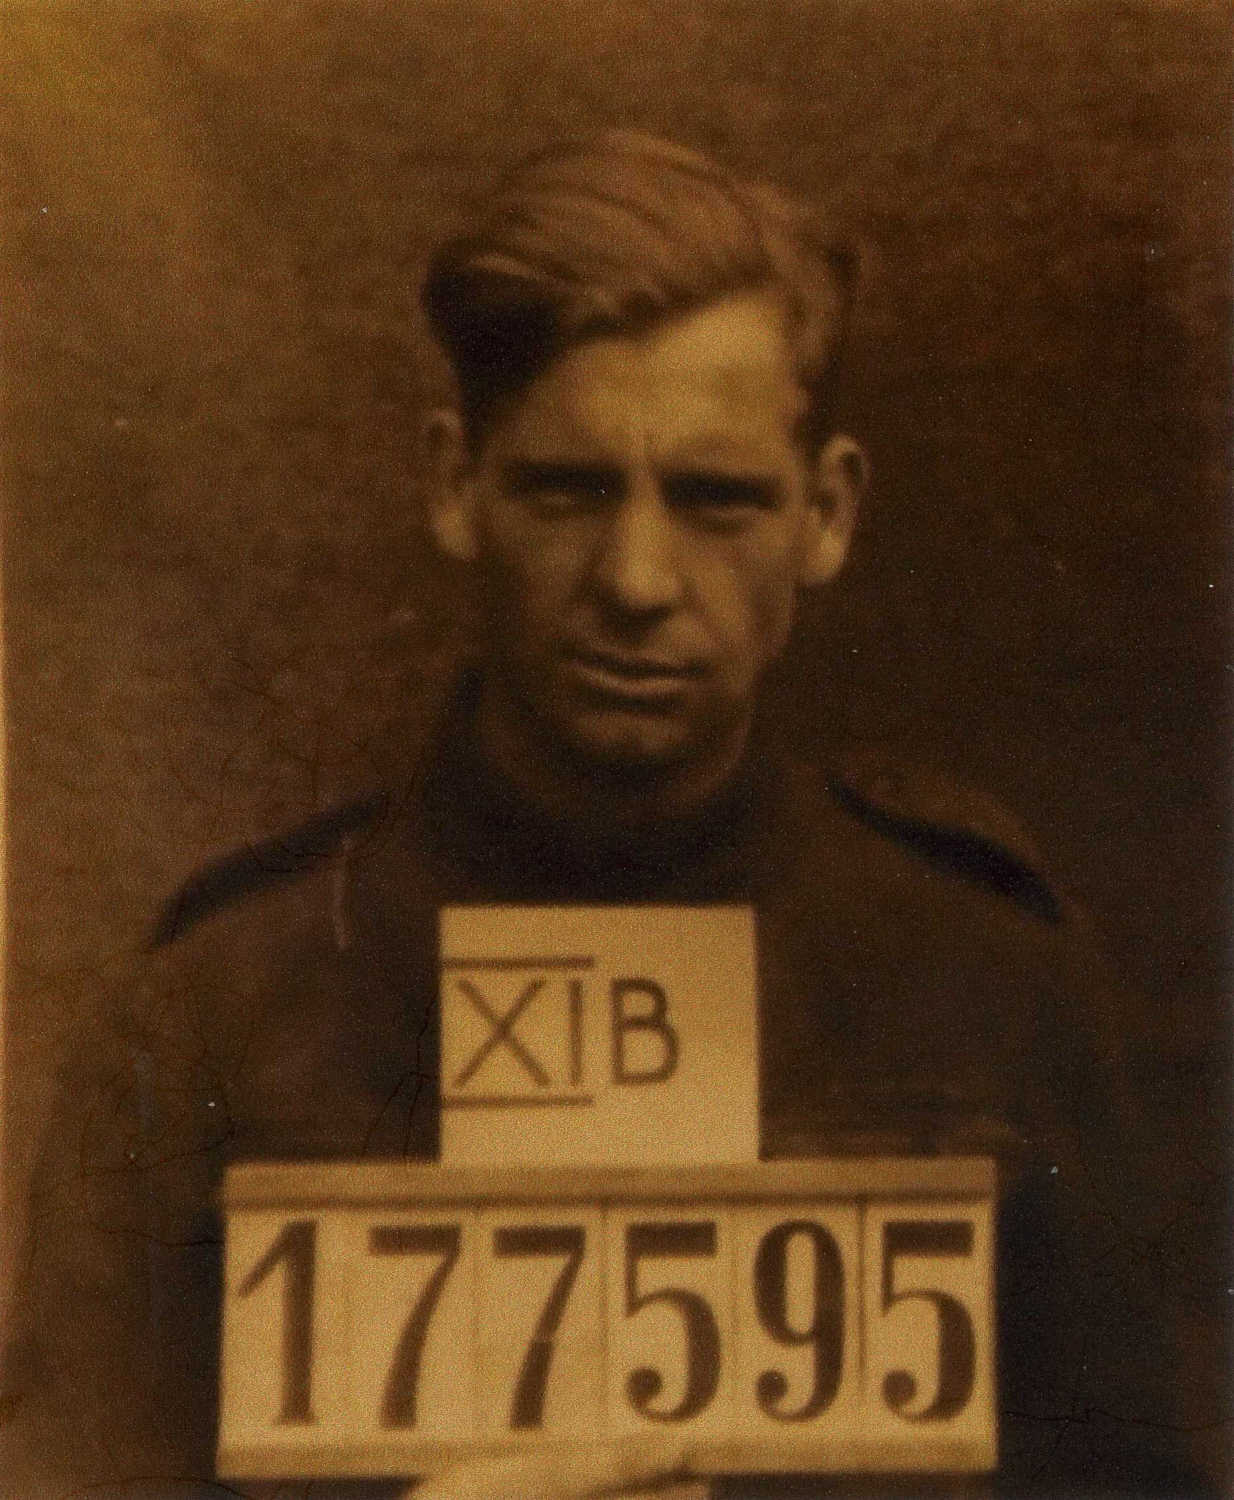
Dvr. Horace Hollands. 'D' Transport Platoon, attached to No 3 Parachute Platoon. Photo taken on 28/09/44, whilst a POW. Courtesy of John Howes.
Dvr. 'Jim' Wild; "I was Captain Gell's Batman and Platoon Runner before and during the Battle, and led the Platoon into Arnhem as an outrider, along with Dvr. Jones, T.E. Our first engagement was down near the River on the outskirts of Oosterbeek, and from then on we had various engagements until we arrived near the Bridge around 21.00 hrs." One of these, was as they came to the area of the small harbour, and were passing it: "With the river on our right and houses on our left, we came to a small square and were fired on by a Heavy Machine Gun. Having taken the necessary action - getting flat on the deck - and someone despatching the gun crew, we were on our feet again. Much to our surprise, a German soldier also stood up and was promptly taken care of. How he came to be amongst us we will never know." [8d]
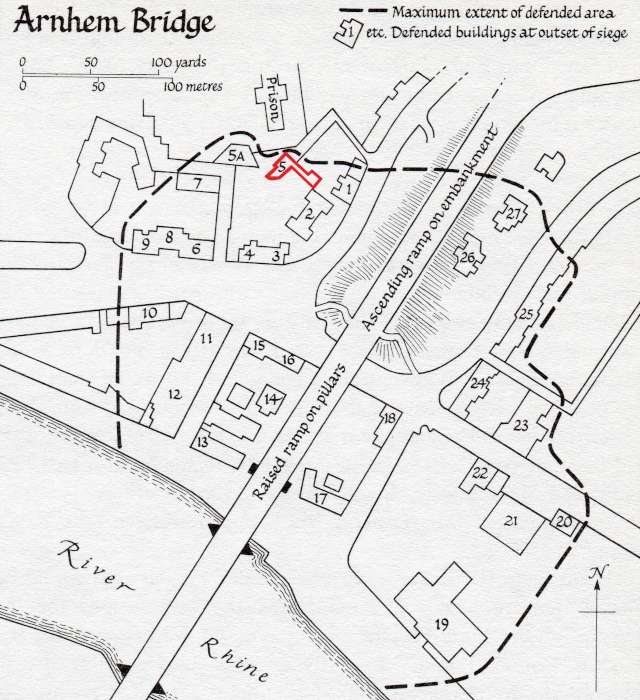
No 3 Parachute Platoon, 250th (Airborne) Light Composite Company, R.A.S.C. and other defenders at Arnhem Bridge. 17 - 21 September 1944. Unit Dispositions: All Company's and Platoon's are 2nd Battalion and 'R.E' is 1st Parachute Squadron, unless otherwise stated. Changes after Monday are noted.
KEY TO POSITIONS AROUND ARNHEM ROAD BRIDGE 17th - 20th September 1944.
1). Part of Brigade H.Q. Defence Platoon.
2). Brigade H.Q; Aid Post; German prisoners.
3). 2nd Battalion H.Q.
4). Part of Mortar Platoon.
5). No 3 Parachute Platoon, R.A.S.C.
5a). Mortuary.
6, 7, 8). Parts of H.Q and S.P Company; glider pilots; 9th Field Company's third position (in 6).
9). Anti-Tank Battery H.Q. (after leaving 14 on Monday).
10). Small mixed party.
11). 'B' Company.
12). No 1 Platoon (from Monday night).
13). No 1 Platoon and Vickers MMG's (until Monday night).
14). Anti-Tank Battery H.Q. and 9th Field Company (Monday only).
15). 'A' Company H.Q; H.Q. and part of 'B' Troop R.E.
16). No 2 Platoon, replaced on Monday by 9th Field Company.
17). Platoon of 'B' Company, later reinforced by No 2 Platoon.
18). No 3 Platoon.
19 - 22). No 8 Platoon, 3rd Battalion, and part of Brigade H.Q. Defence Platoon. (20 and 21 believed lost on Monday).
23). Part of Brigade H.Q. Defence Platoon (lost on Monday).
24). R.A.O.C. and Signals Section.
25). H.Q. Troop R.E. and Signals Section.
26). (The School) Parts of 'A' and 'B' Troops R.E; 'C' Company H.Q and No 9 Platoon, 3rd Battalion.
27). Part of 'A' Troop R.E. (temporarily on Sunday night only).
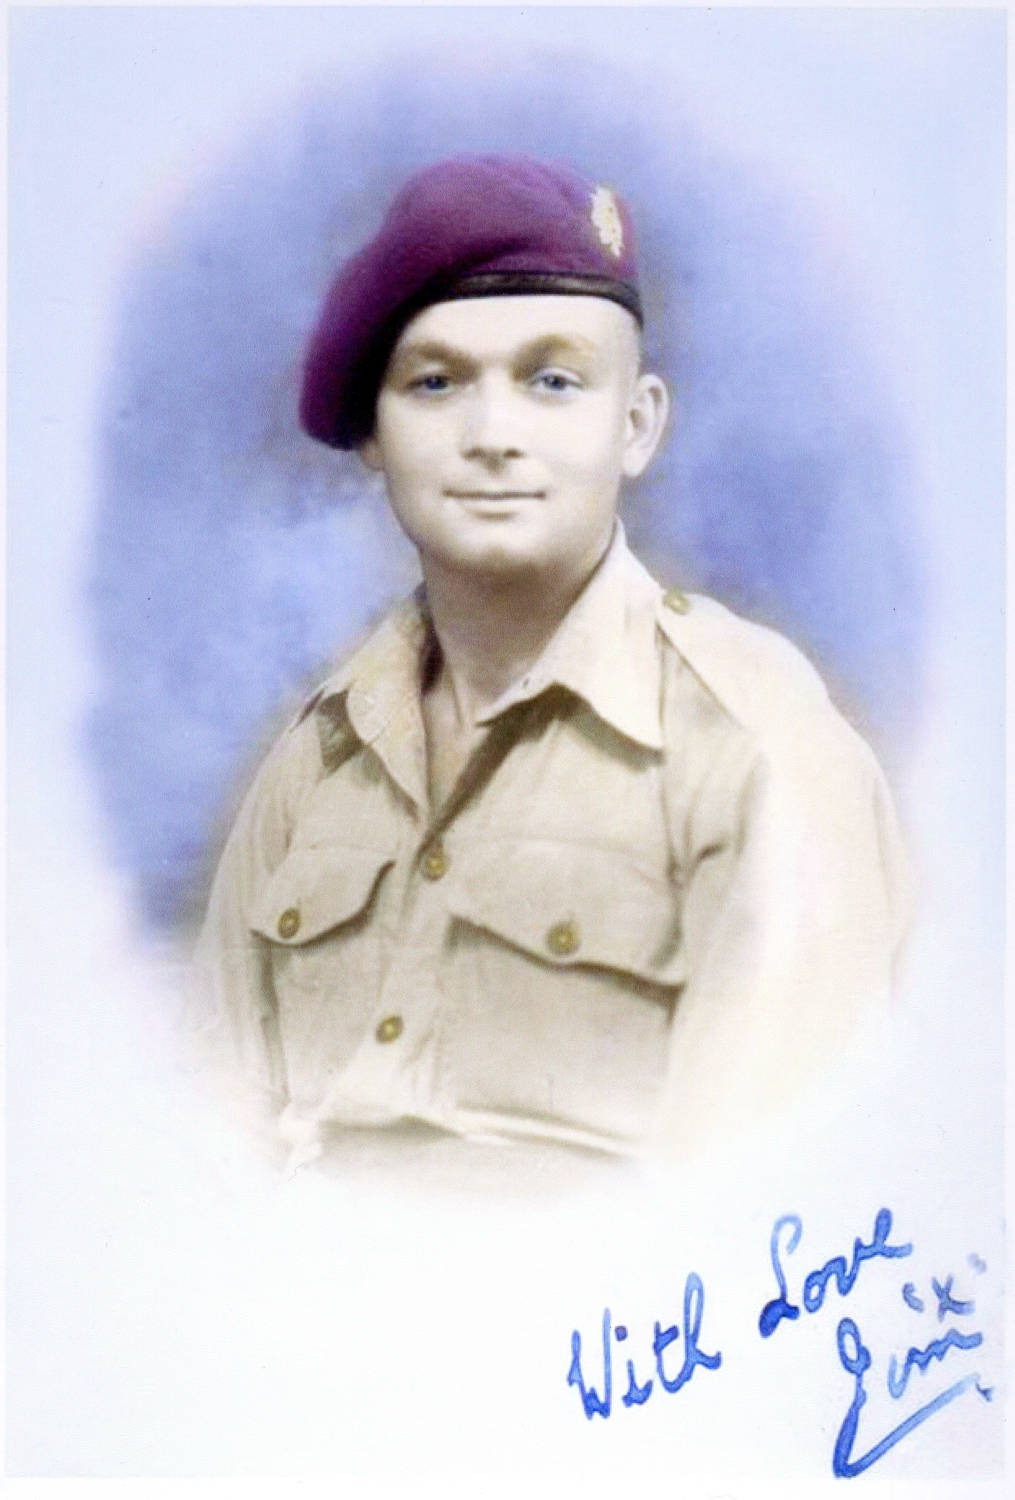
Dvr. 'Jim' Wild. No 3 Parachute Platoon. Photo taken in North Africa in 1943. Courtesy of Bob Gerritsen.
What of No 1 Parachute Platoon, still out at the D.Z. area, who had now moved into the Klein Amerika Farm. Capt. Cranmer-Byng wrote about that first day in a newsletter, "THE 250". Arnhem Pilgrimage: "I visited the farm that No 1 Para Platoon occupied for the first day and a half after landing. It was the farm in the middle of the D.Z., where we dumped all the containers. The old Dutch farmer and his family are back there and remembered us and how they gave us fresh milk to drink just after landing."
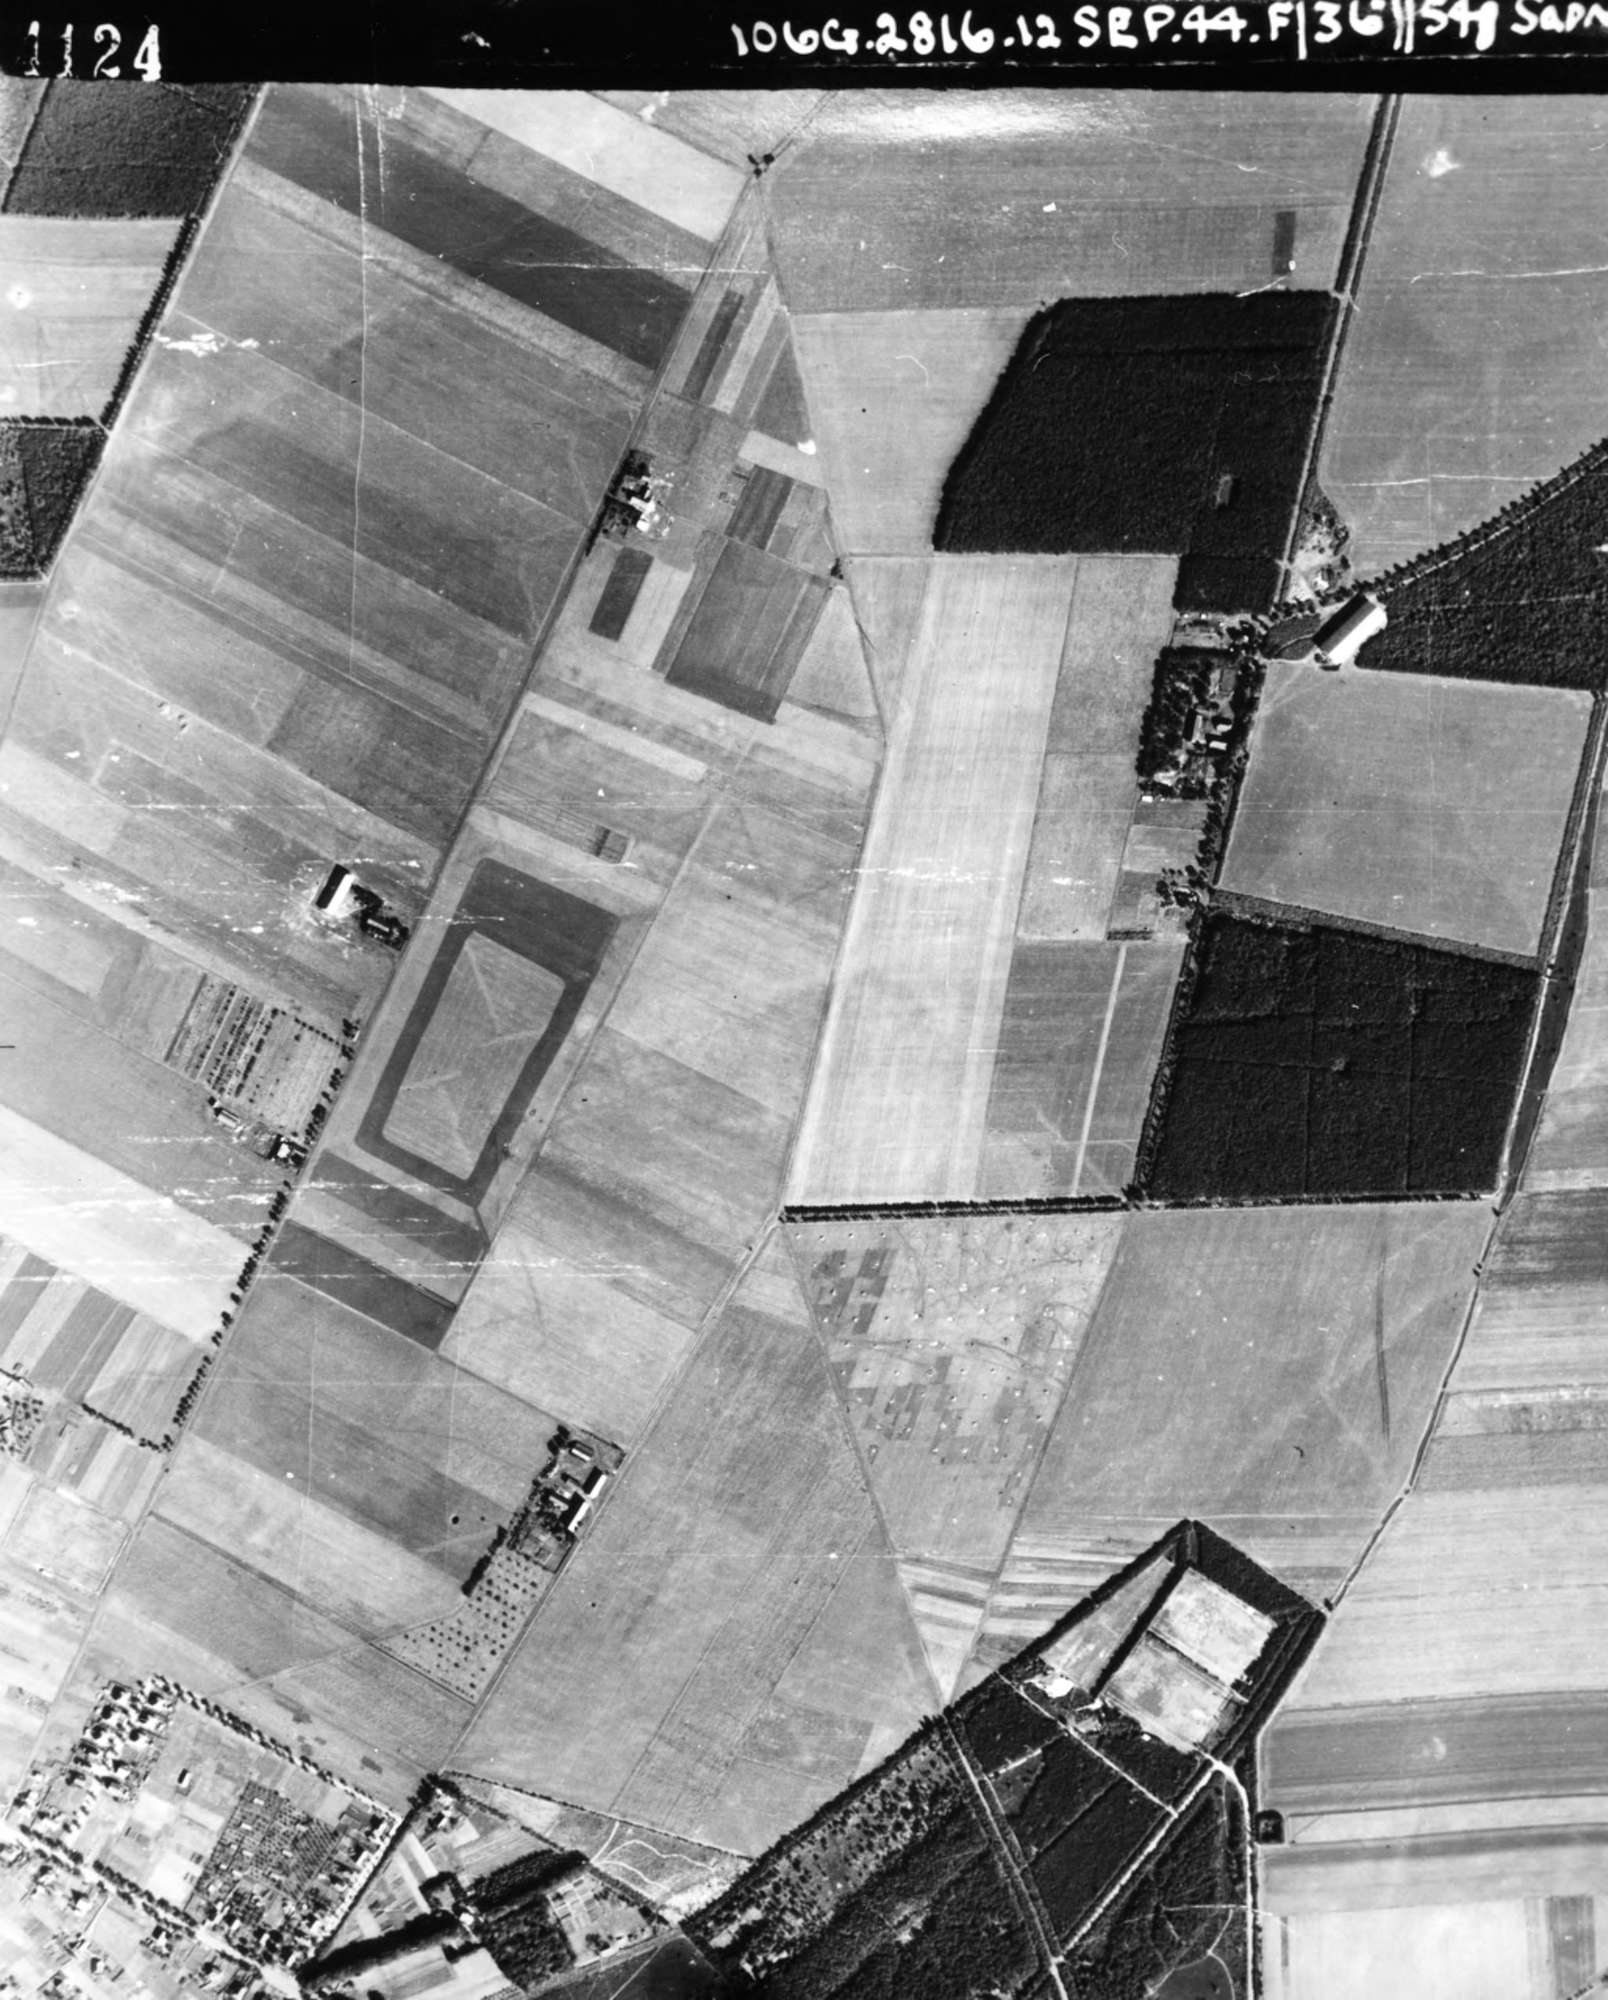
Klein Amerika Farm, Renkum, and what was to be D.Z. 'X' and L.Z. 'Z'. Aerial photo taken 12th September 1944. Courtesy of Gelders Archief, 420.
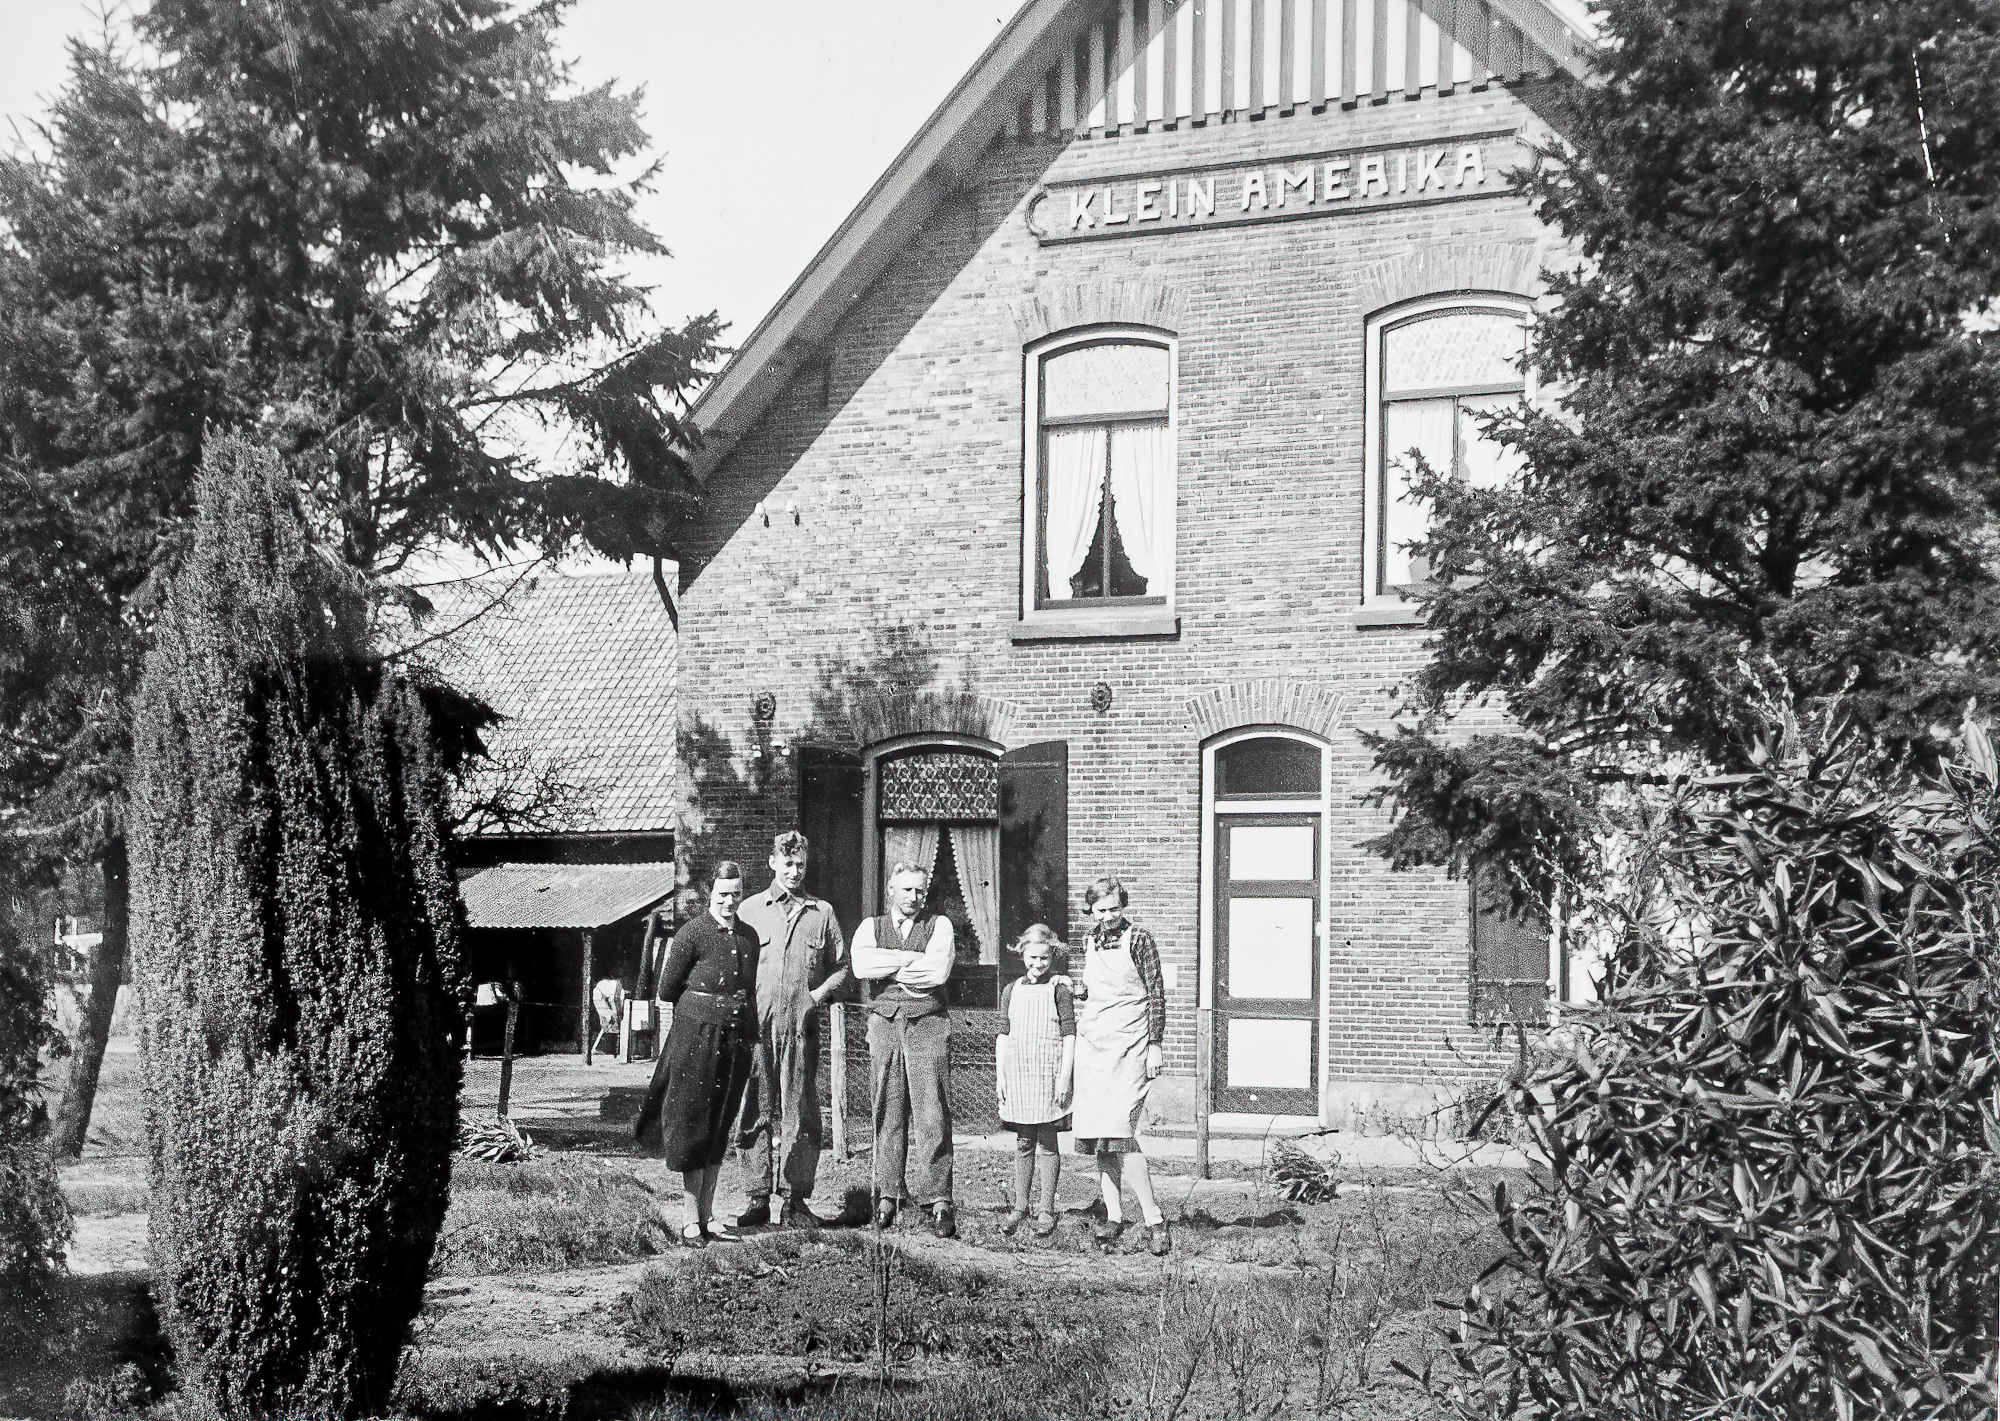
The Klein Amerika Farm in the 1930's, with the Doorestijn family standing outside. Courtesy of Jan van de Lagemaat and Jeanne van Poppel.
Dvr. Jack Taylor: "I was a driver with 1 Para Platoon and took off for Arnhem from Barkston Heath airfield, which is near Grantham, our Platoon was assigned to the 2nd [Parachute] Battalion to set up a supply line between the bridge and the supply dump which was to be serviced by 3 Platoon, who were on D.Z. duty. Everything appeared to be going to plan and we made our way to the collection point which was a farmhouse on the outskirts of Heelsum adjacent to the drop zone. Unfortunately, we suffered a couple of casualties on the drop, and our C.O. decided that as 3 Platoon was at full strength, to despatch them to the Bridge and take over D.Z. duties with 1 Platoon." [9a]
The Platoon were assisted in their task by a friendly Dutchman who spoke good English, Maj. 'Tony' Hibbert: "We had retained one of the Dutchmen whom I had picked up on the D.Z. and he was acting as our guide. The other we had left behind with Jack Cranmer-Byng and the R.A.S.C. Platoon to collect in the spare arms containers from the D.Z." [9b]
It is at this point, that some confusion arises as to what happened next. From the 1st Airborne Division Headquarters, After Action Report, at Appendix 'H', under Diary Of Events as affecting the ADM side, it states: '17 Sep. AA & QMG and ADMS landed with Tac Div HQ and set up in wood 658797. Parachute Pl 1 Para Bde landed and commenced to recover Bde res amn dropped in spare containers from DZ. One load of this amn was taken into town in captured German veh and succeeded in reaching br party. Veh however shot up on its return. Portion of 1 A/L Bde Para Pl landed with Bde and moved into town with 1 Para Bde to carry out assessment of dumps of pet, amn, stores, etc. in town. This Pl reached the Br area 1 Para Bde, fought with them, and the greater part were later taken prisoner.'
The part of the Report underlined is not correct, and the mistake probably originated with the following statements: Capt. Cranmer-Byng: "In the afternoon a messenger arrived back from the outskirts of Arnhem. He said the road into the town was held by the enemy. A captured lorry full of ammunition for the Brigade on the bridge had been attacked twice, and had only got through by the determination of its driver and crew, the Sergeant in charge had been killed." [10] Later still, after the War, when Lt-Col. Packe was writing for the R.A.S.C. Journal, he stated: "We know; too, of a driver who took a captured enemy lorry into the town of Arnhem with a load of ammunition for the isolated Parachute Brigade; several times he came under fire, but he hid up for the night in a side street, safely delivered his load and returned to headquarters for more - with a vehicle which looked like the top of a pepper-pot."
Part of the task for No 1 Parachute Platoon was to also commandeer any transport they could find, enemy or civilian, and what really happened comes from several sources, the first being a letter written by Cpl. Harry Symmons to the Casualty Department in 6th July 1945, upon his return from POW Camp: "Believed killed:- T/187114. Sgt. J. Walsh. - KIA. During an engagement near Arnhem late on Sunday, 17th Sept 44. Would refer you to Dvr's L.N.J. Hart, E.E. Farnworth, R. Nutley & R.S. Simcox who were with Sgt Walsh at the time".
This is corroborated by Dvr. 'Ron' Nutley: "The lorry was a 5 ton lorry we had commandeered from the Germans. The loading was almost completed when I got to it, 'Jack' Hart, myself, Sgt. [Walsh] and several others got underway pretty quickly. 'Jack' Hart was driving and Sgt. [Walsh] was sitting in the cab with him. We headed towards Oosterbeek on the lower road where we came up against heavy resistance. We had quite a few Bren guns on board and I took one of them and put it on the roof of the cab and continued to let rip at Jerry as we travelled along. We got ambushed near the railway bridge at Oosterbeek. Our lorry went through a tunnel, we were heading for the lower road, immediately we got through we came under a hail of fire. A German [armoured car] was also coming up the road so we all jumped from the lorry, I slid down a bank into a meadow while 'Jack' Hart turned the lorry round and took off back through the tunnel to get the hell out of it with the supplies". [11]
On the 'Graves Concentration Report Forms' of January 1946 it states 'Date of Death' for Sgt. John 'Jock' Walsh as unknown, but on the 14 January 1946 this is crossed out and a handwritten, red ink entry has been made 25-9-44. As the grid for his burial place is 714774, right next to the Railway Bridge underpass in Oosterbeek, this would suggest that he was indeed the commander of the captured German lorry, and was killed near that spot in the encounter with the German armour.
In a letter to the parents of Sgt. Walsh, after the War, Capt. Cranmer-Byng wrote: "We also captured a German lorry in working order. By 6.30 that same evening the lorry was stacked full of arms and ammunition; a very valuable cargo. Before we left England it had been agreed that the very first lorry available I should send off to 1st Para Brigade at the Bridge in Arnhem. Normally it would have been the job of a Corporal to take the lorry through, but owing to the great importance and difficulty of this job I sent "Jock". I knew that he was 100% reliable, and would get the ammunition through somehow. He chose some men to accompany him, and said a cheerful good-bye, and set off in great style. It was a difficult and dangerous job, and he had to travel about eight miles in a captured German lorry, through territory still disputed by the enemy and find the British troops somehow, although it was getting dark. He got three quarters of the way and then was held up at a railway bridge over the road on the outskirts of Arnhem town. Jock jumped down from the lorry to see if the obstruction was made by our own paratroopers. At that point some Germans appeared out of the dark and in the battle that followed I am afraid that he was killed. His action certainly saved the lorry and those aboard it. The driver quickly turned round and got away safely during the firing. Eventually, he got through to 1st Para Brigade in Arnhem and delivered the only load of ammunition they ever received by way of reinforcement. The action in which Sgt Walsh was killed took place at approximately 8.30 pm on the 17th September. On the following morning, I sent another lorry to attempt to reach 1st Para Brigade, this time under two L/Cpls. Again, the lorry ran into a German patrol and one of the L/Cpls was killed. However, they were able to deliver the load to Divisional HQ which was some way outside Arnhem. At about 11.30 that morning, one of the men on your son's lorry reported back to me and told me of the sad news. I was terribly sorry to lose him, especially at an early stage in the battle, but at least I knew that he had been given the important job that he wanted and that he had not failed."
There are various mentions of enemy lorries being encountered in the area to the south of the D.Z. Brig. Gerald Lathbury, the Commander of the 1st Parachute Brigade, wrote: "There was no opposition on D.Z. or L.Z., but 2 Bn ambushed a number of German vehicles at Heelsum - their R.V. - and took about 20 prisoners."
In his detailed account Maj. 'Tony'Hibbert wrote: "14.20 hrs. Several Dutchmen had come out from Heelsum to greet us; found two who could speak English well and took them with me to the R.V. interrogating them while we walked. They reported that there were a few very third rate troops in Heelsum and the neighbouring villages with very little transport and probably only armed with rifles." Later on in his account he mentions: "14.45 hrs. 2nd Bn reported captured several prisoners which were brought in shortly afterwards. Very nondescript types, some Luftwaffe, no information of importance." And then later still: "16.10 hrs. Crossed main road East of Heelsum. Several German lorries and cars strewn about the road where 2nd Bn had done some ambushing. None of the cars would go."
In the After Action Report by Maj. 'Digby' Tatham-Warter, the Officer Commanding 'A' Company, 2nd Parachute Battalion, he wrote: "No opposition at RV - 'A' Coy captured six vehicles and 12 prisoners."
The 1st Bn, The Border Regiment sub units were moving into place, with 'D' Company taking up a position in a small urban area on the north side of Heelsum where the Telefoonweg crossed the Bennekomseweg. The Platoons dug in quickly in the gardens of the nearby houses. 20 Platoon, commanded by Alan Green, were on the south-east looking towards Heelsum. Here the ground dropped away and overlooked some open ground to a row of house on the edge of a wooded area. 21 Platoon under Lt Philip Holt were on their right facing in the general direction of Renkum and 22 Platoon under Lt George Brown were on the north side facing the LZ. As the Company came into their positions they surprised a German lorry coming along the Heelsum road, killed two of the occupants and captured the remainder. [12]
All of this vehicle activity was probably connected with a German Logistics or Supply Unit using the Klein Zwitserland Hotel as a base, and possibly, where the truck used by No 1 Parachute Platoon came from.
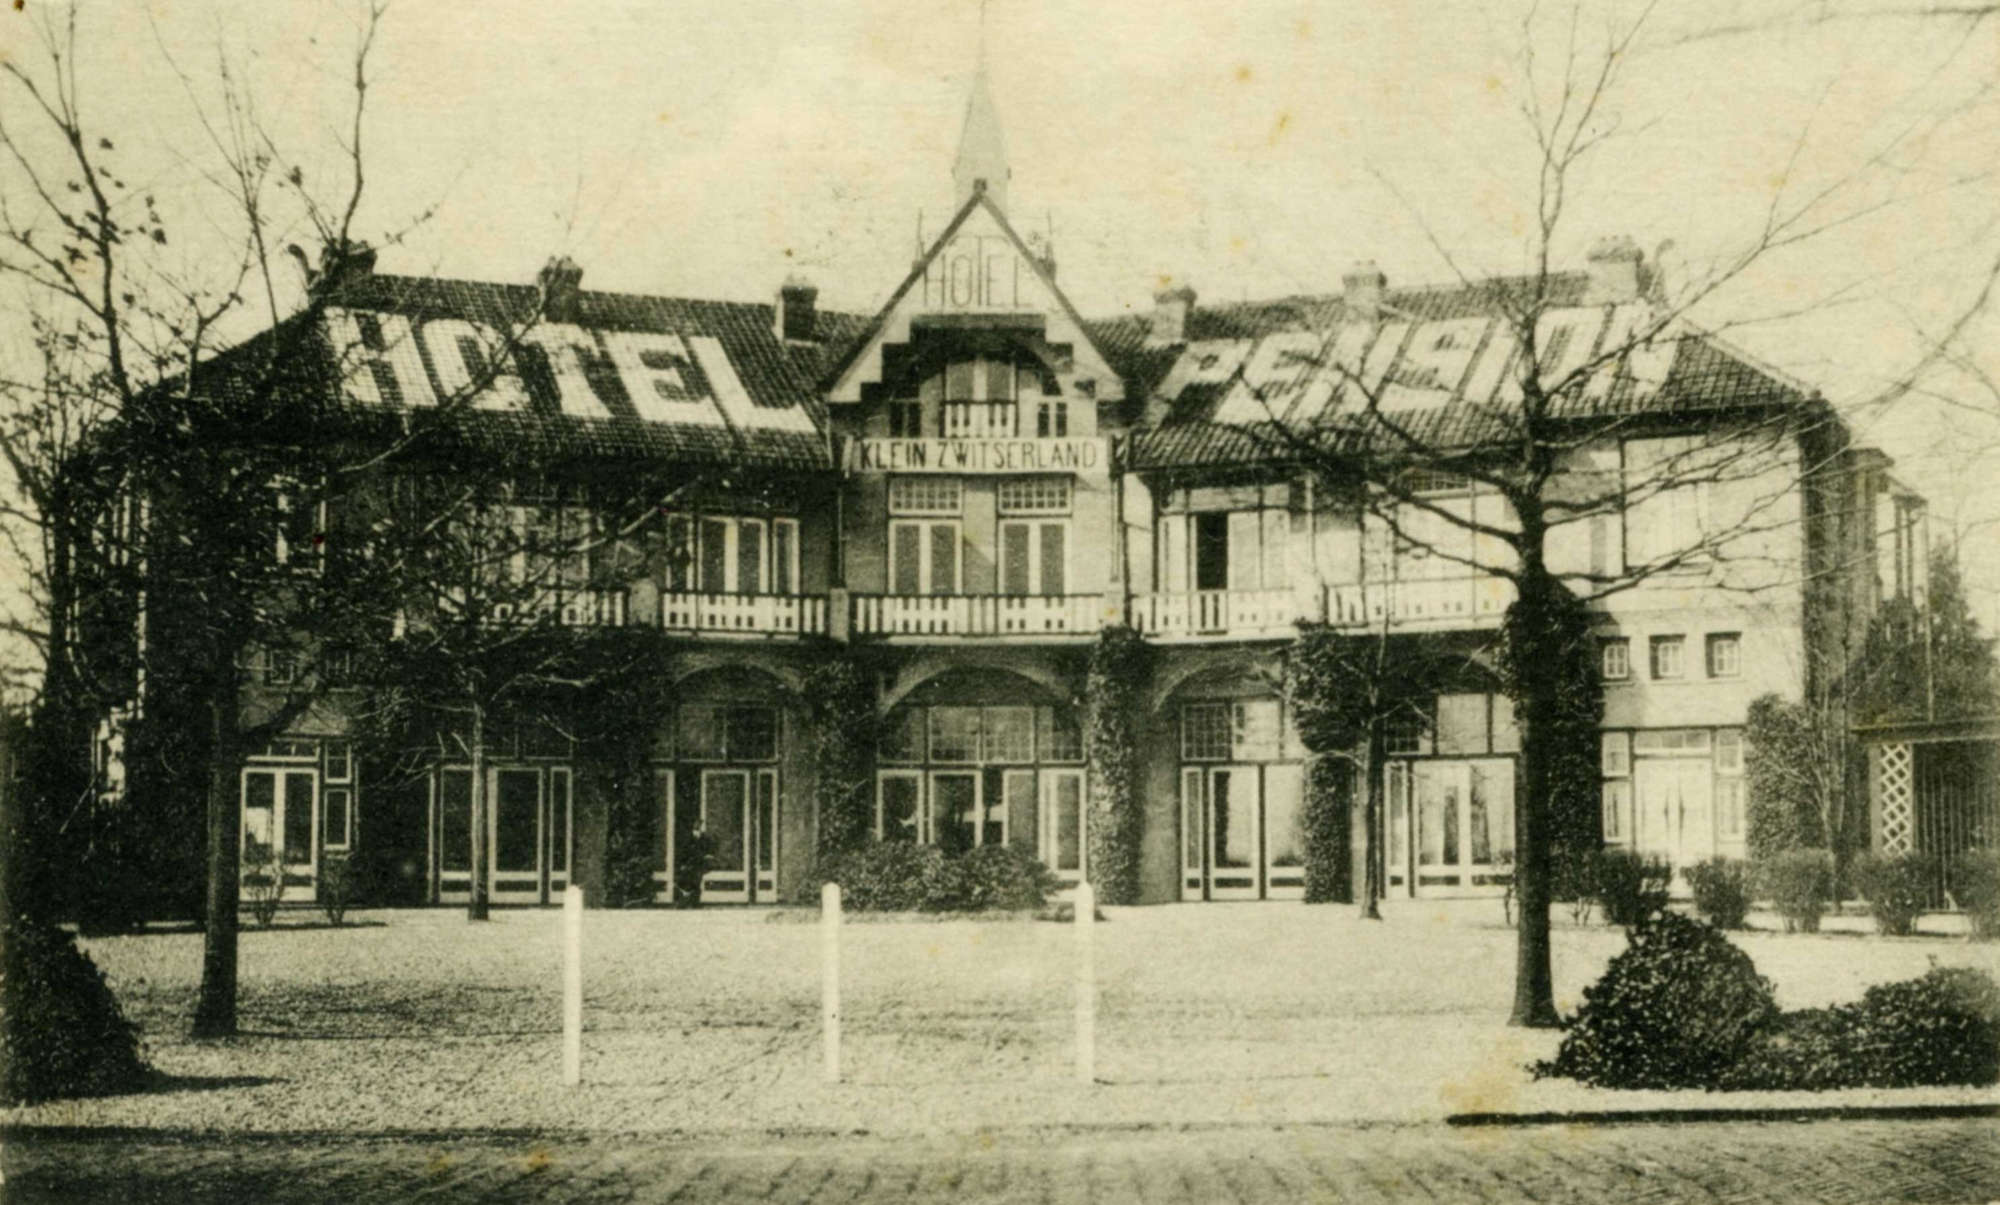
The Klein Zwitserland Hotel, Heelsum, circa 1900. This view is looking from the South-east, and behind the building would be D.Z. 'X'. Courtesy Bob Hilton Collection.
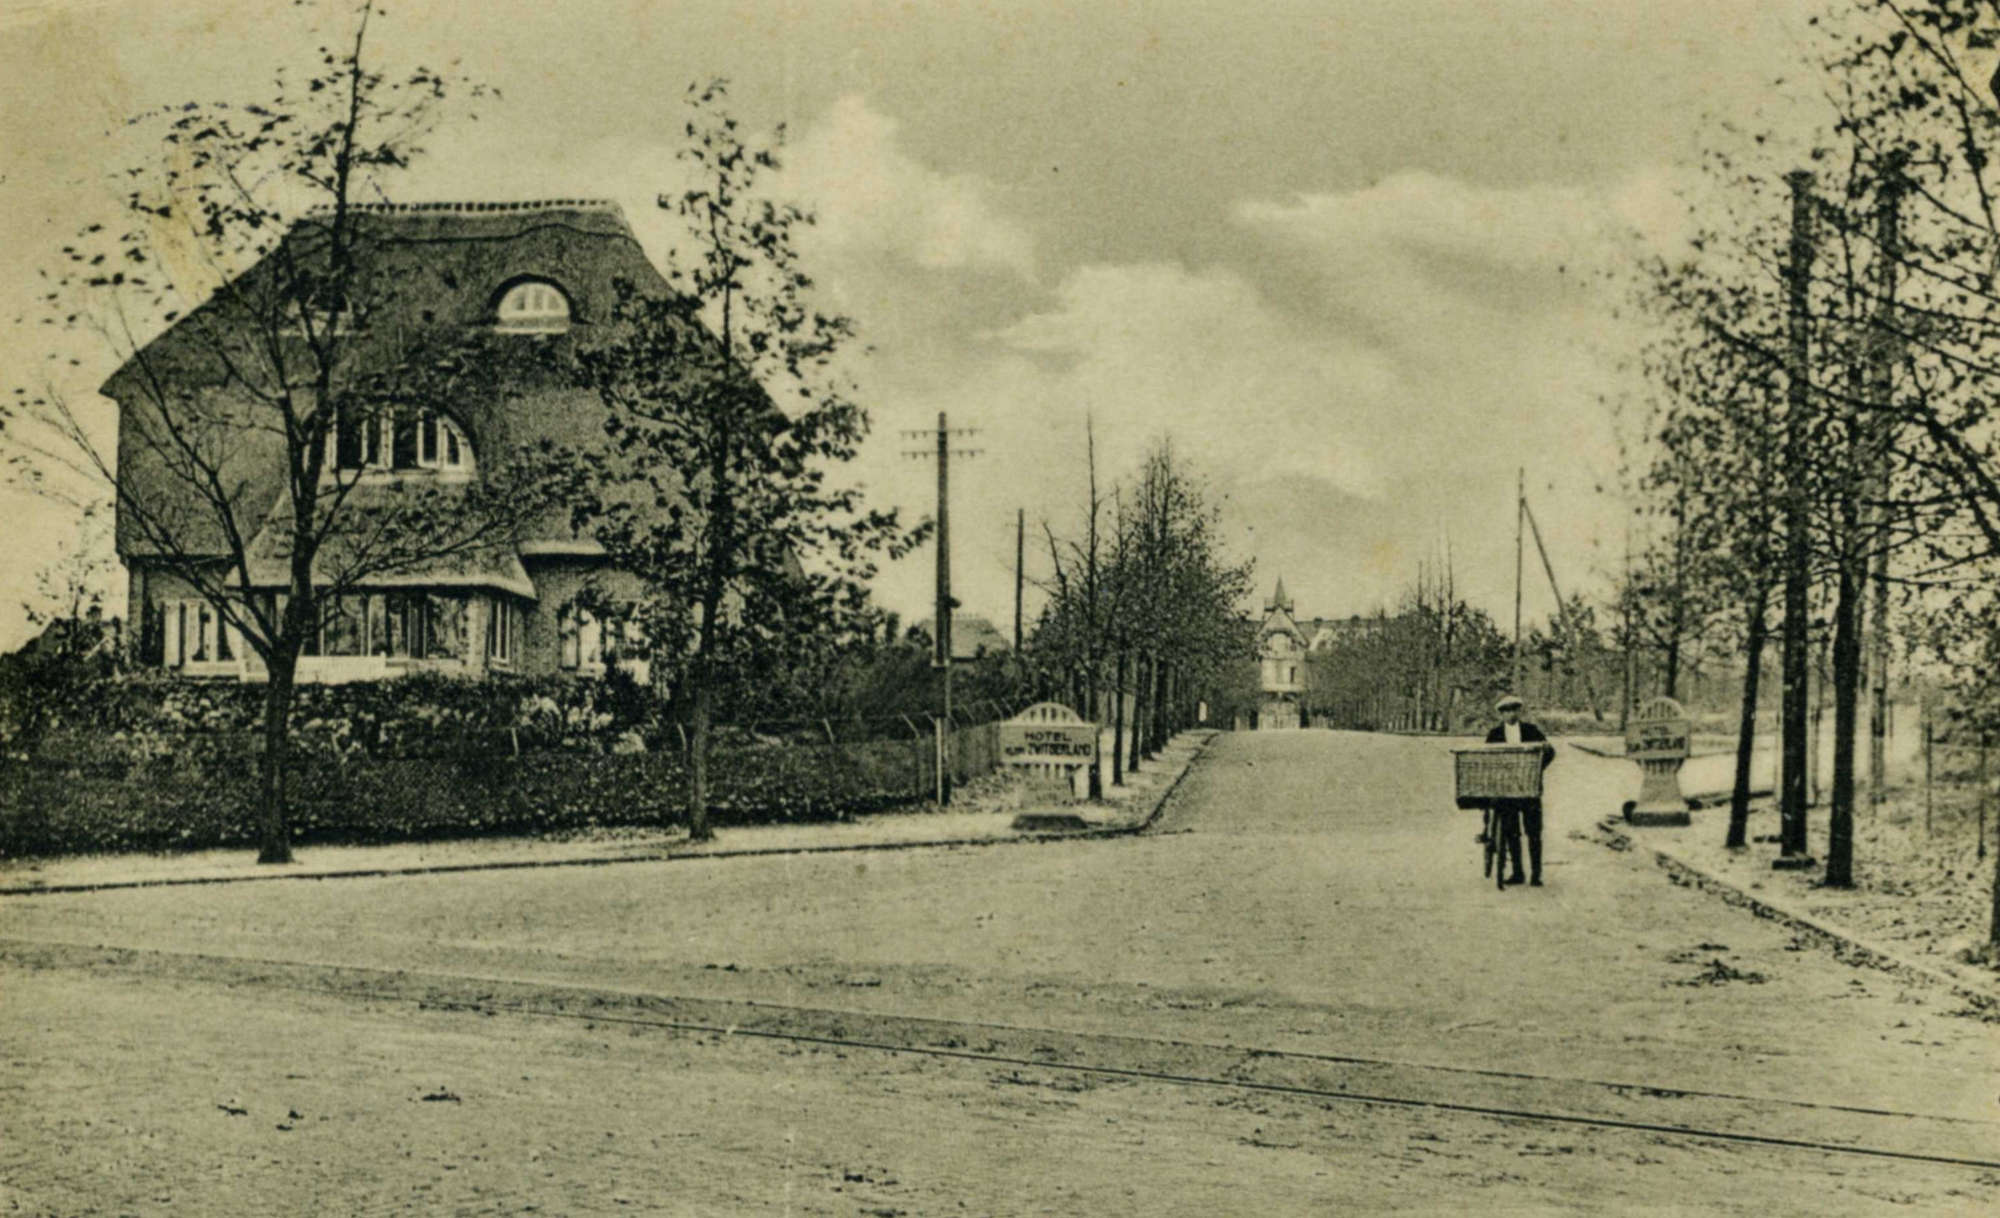
Looking towards the Klein Zwitserland Hotel, Heelsum from the junction of the Utrechtschestraat and Bennekomscheweg, along the Bloemenlaan, circa 1900. To the right of the boy with his delivery bicycle was the R.V. point for the 2nd Parachute Battalion. Courtesy Bob Hilton Collection.
There was another unit out on the D.Z. area, a section of men from 'C' Troop, 1st Parachute Squadron, R.E. under the command of Capt. Stephen George, the Squadron 2 i/c, had been left behind to collect supply containers. Spr. Leslie Plummer: "I jumped out No 2 after the Officer, we had a good landing and it wasn't long before we had gathered up our containers, etc on our trollies and formed up with the 3rd Battalion with whom we were attached. Then our 'stick' of ten men were detailed to stay on the dropping zone (DZ) to help collect any ammunition, etc and put it in a small barn at the farm, Klein Amerika, and stay there to guard it. By this time there were a lot of Dutch people on the dropping zone collecting parachutes, etc. There wasn't any opposition at that time, although the Germans were soon in position in the woods facing us, we had to be careful as we were being shot at if we moved about the farm." [13]
Spr. 'Tom' Hicks: "As we sorted ourselves out at the RV, a Dutch girl brought us milk from a nearby farm that was named Klein Amerika. The farmer also came out with a big black horse harnessed to a flat wagon, 'I help,' he said, and he did. Quartering the area, we threw the debris on his cart together with several injured lads using the front garden of his farmhouse as a collection point." [14]
Spr. Alexander Johnston: "On landing at [Renkum] Heath, we mustered under the blue smoke 1st Brigade H.Q. 1st Bn - Green smoke, 2nd Bn - Yellow smoke, 3rd Bn - Red smoke. By this time Dutch civilians were swarming onto the D.Z, most of them bundling up the discarded parachutes and disappearing with their loot. One young lady approached myself and two mates and gave us 3 jars of pickled food - Pork, Carrots, Peas. I fell heir to a jar of carrots. My stick was detailed to collect stores from the D.Z by means of our two wheeled trolleys and a horse, and a cart from somewhere, and to make a stores depot at a nearly farm yard." [15]
NOTES:
[1] Letter to Bob Hilton from Thomas Jones. 12 January 1998.
[2a] Letter to Bob Hilton from John Perfect. 10 January 1997.
[2b] 'Blik Omhoog', by Cor Janse, page 651.
[2c] 'Arnhem 1944. The Human Tragedy of the Bridge Too Far', by Dilip Sarkar, MBE, page 10.
[3] Letter to Bob Hilton from Jack Brooks. 8 October 1997.
[4] & [6] Letter to Bob Hilton from Bill Gell. 12 September & 31 October 1997.
[5] Letter to Mr & Mrs. Walsh from Jack Cranmer-Byng. 23 September 1947.
[5b] Letter & account of Ron Nutley to Bob Hilton. 8 September 2004.
[5c] Extract from an interview in The Daily Mail. 17 October 1944.
[7] & [8d] Letter from Jim Wild to Bob Hilton. 1 September 1997.
[8b] 1 Para Bde HQ. Diary Of Events. September 1944. Appx 'A'.
[8c] "ARNHEM, The Fight Too Sustain", by Brig. F. Steer, page 71.
[9a] Letter from Jack Taylor to Bob Hilton. 28 September 1995.
[9b] 1 Para Bde HQ. Diary Of Events. September 1944. Appx 'A'.
[10] Account of Captain. J.L. Cranmer-Byng. September 1945.
[11] Account of Ron Nutley, sent to Bob Hilton. 8 September 2004.
[12] 'When Dragons Flew', page 112.
[13] Letter & account from Leslie Plummer to Bob Hilton. 19 August 1996.
[14] 'Captured At Arnhem', by Norman Hicks, page 161.
[15] Letter & account from Alexander Johnston to Bob Hilton. 16 December 1996.


